Sourdough Starter
Creating a Sourdough Starter is both a science and an art. This harmonious blend of natural yeasts and friendly bacteria is the magic behind your tangiest most flavorful bread recipes. This sourdough starter recipe is your ticket to countless uses including bread, pancakes, muffins and crackers. Once you get a starter going, it can last indefinitely.
Easy Sourdough Starter Recipe
Creating and maintaining a sourdough starter can be a fun process, but it does requires some attention and care. Here are some tips for starting and maintaining a Sourdough Starter: (Scroll down for full printable recipe.)
- Start with high-quality ingredients: Sourdough requires so few ingredients a special effort should be made to use a good-quality flour and filtered or spring water.
- Choose the right flour: All-purpose flour can work fine but I prefer using a whole grain flour like whole wheat as demonstrated in this recipe. Whole wheat will kick start the fermentation due to their higher nutrient density.
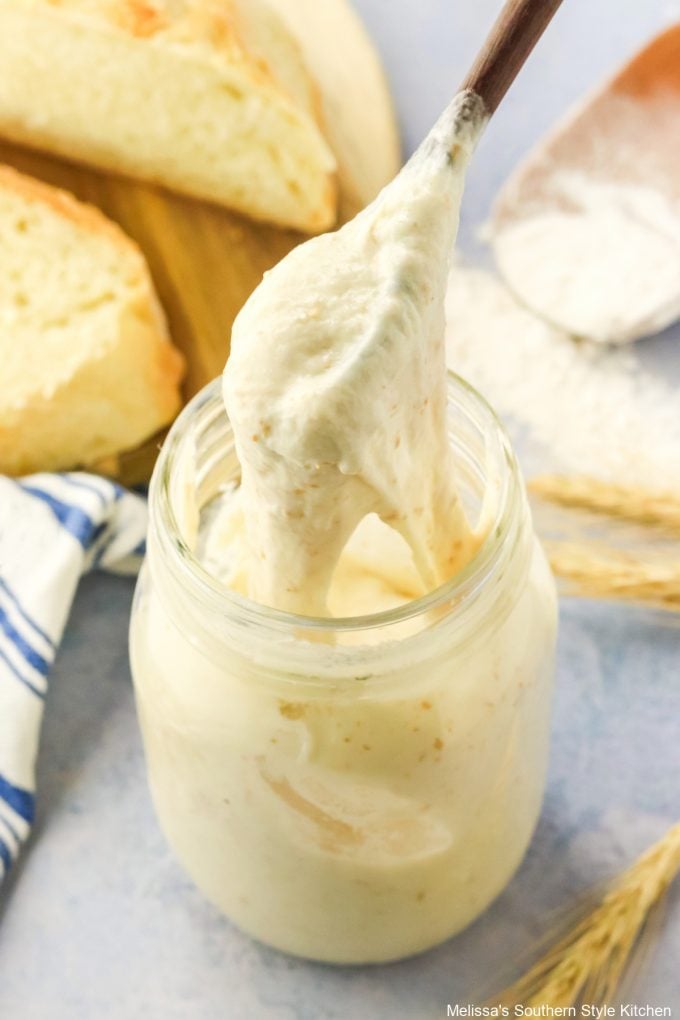
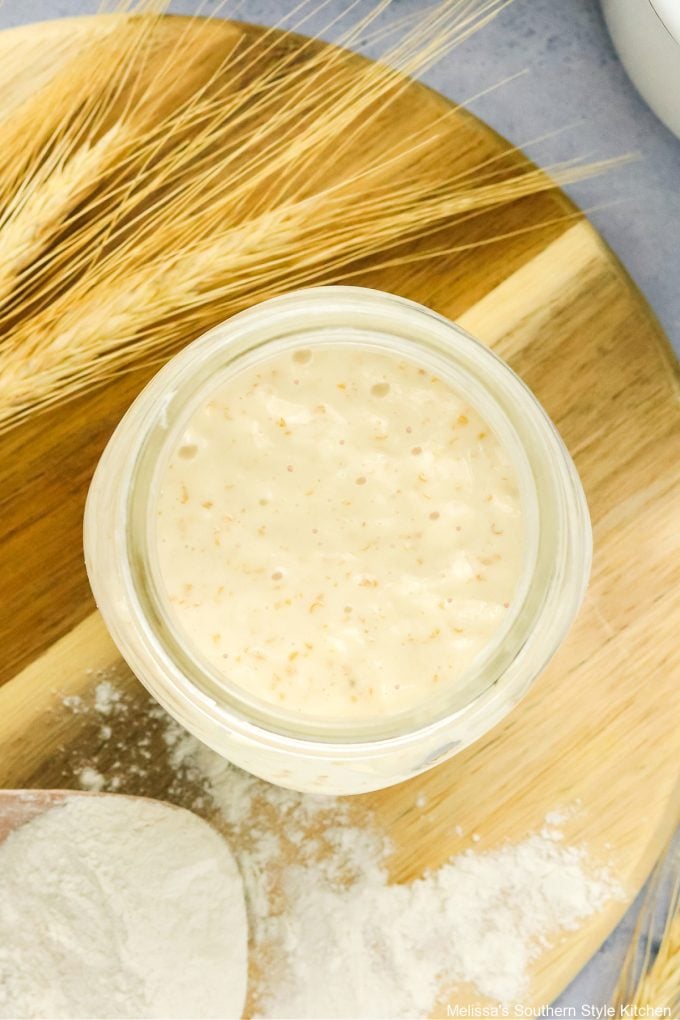
- The amount of hydration in a starter affects its consistency and activity. This sourdough starter recipe is made with equal weights of flour and water, resulting in a batter-like consistency.
- To keep a starter healthy and active, it’s necessary to “feed” it regularly. Feeding typically involves discarding a portion of the starter and then adding fresh flour and water. Follow the recipe instructions for the proper amounts and frequency.
- When making a sourdough starter from scratch it’s important to try to feed your starter at roughly the same time each day. Consistency helps establish a stable environment for the microbes in your starter to thrive and grow.
- What’s the best temperature for a starter? Yeast and bacteria thrive in warm environments. Keeping your starter in a warm spot, ideally between 70-80°F or 21-27°C will help encourage bacteria fermentation, activity and growth.
- Pay attention to the behavior of the starter. It should gradually increase in volume after feeding and develop a tart sour aroma. If your starter seems sluggish try placing it in a warmer spot and check it again the next day.
- Patience is key. It can take several days or up to a week or more for a new starter to become fully active and stable. Over time and consistency, your starter will become stronger and bloom more reliably.
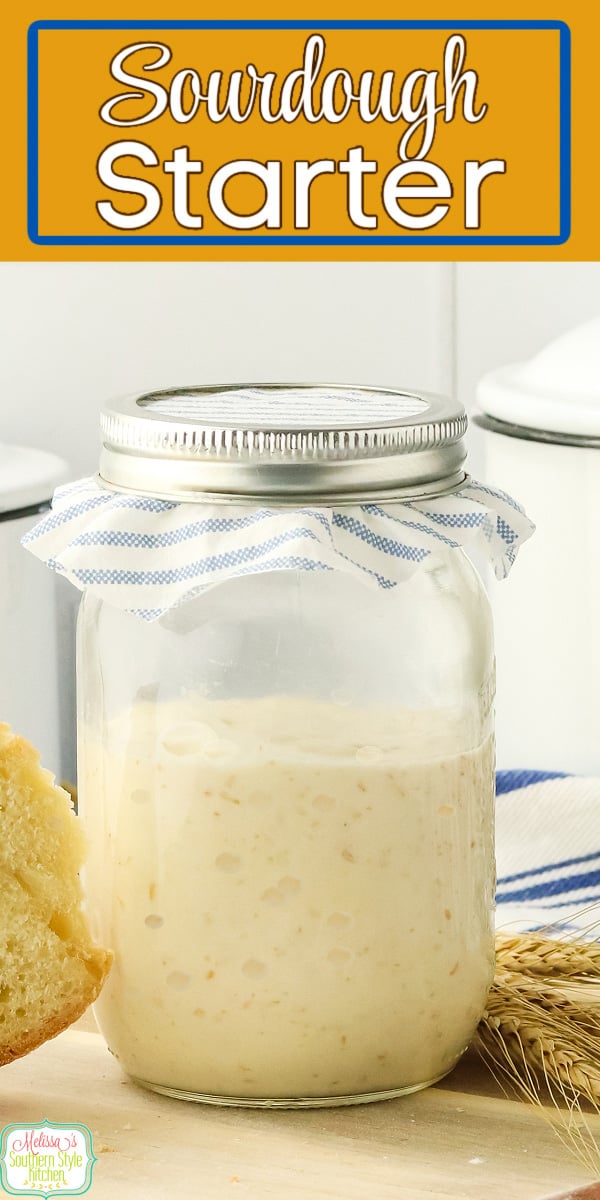
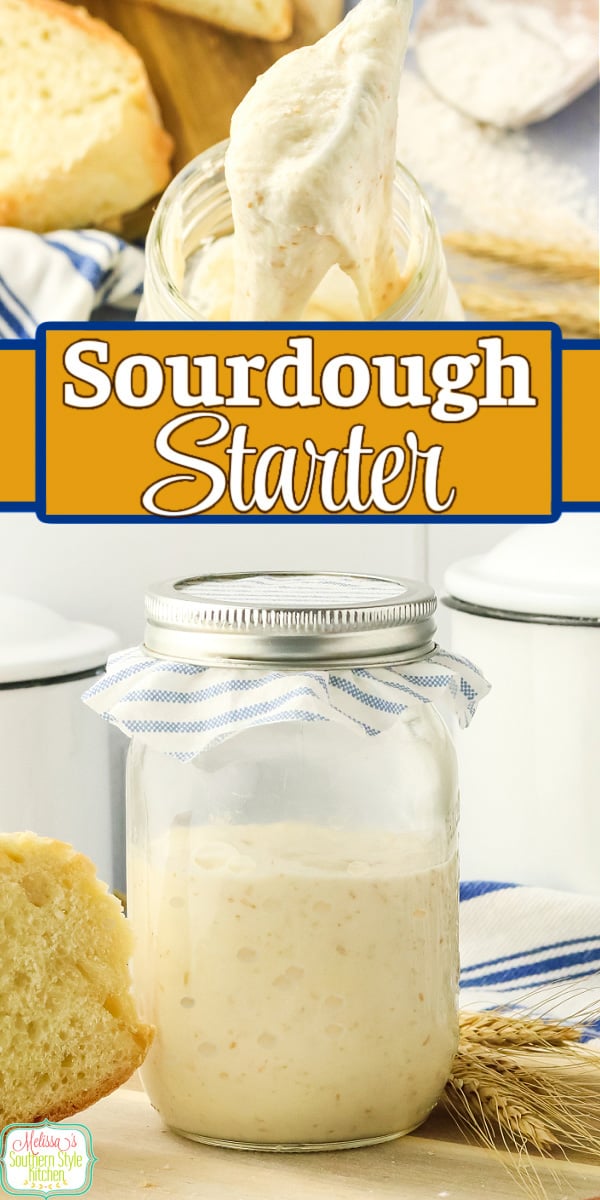
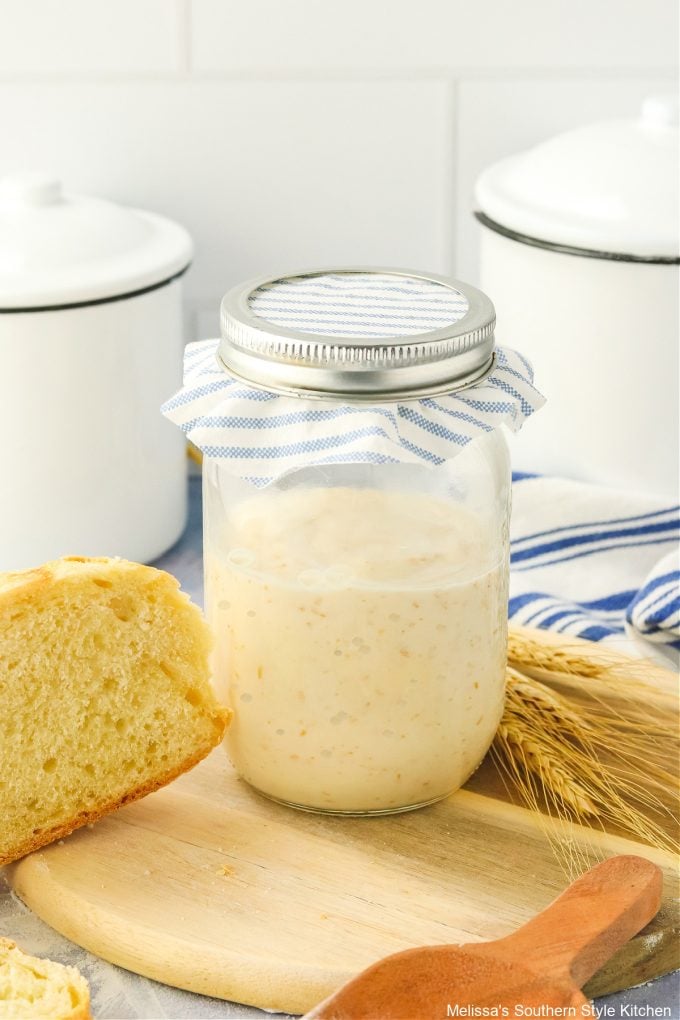
- It’s important to use a clean, food-safe container for your starter such as a mason jar. Avoid metal containers, as they can react with the acids produced during fermentation. Glass or food-grade plastic containers work best.
How to Make the BEST Sourdough Starter Recipe
- Ingredients you’ll need to make homemade Sourdough Bread Starter: Whole wheat flour, room temperature filtered water or spring water, all purpose flour.
- Kitchen tools you’ll need: Measuring cups and spoons, mason jar, spoons for stirring.
- Use the correct water. Don’t use distilled water, you need the nutrients that are still present in filtered water to grow the yeast.
- Be patient! This process generally takes a week but it could take up to 10 days before your starter is ready.
- Don’t toss that discard. Make another starter for a friend or find one of countless recipes using the sourdough discard.
- I wouldn’t recommend beginning the process of growing a starter during winter months. You want warm, consistent room temperatures. If you HAVE to do this in the winter, just know that the starter could take up to 20 days to mature in cooler temperatures.
- Why isn’t my starter rising? It could take up to 8 hours before your starter starts to rise. 98% of the time your starter isn’t rising is due to temperature. Remember, you need warmth to start that fermenting process. Consider sitting it next to a warm appliance like an oven or a proofing drawer to get that temperature up.
- You can use whole wheat flour with all purpose flour as I do or swap out using bread flour or rye, if you would rather. You can even switch halfway through the process.
- You can also do a gluten free sourdough starter version using rice flour. Just keep in mind that the fermentation process takes a lot longer with gluten free flour. It could take up to a month before you get full activity.
- If you drink your tap water, you can use that but you have to prepare it before using and not use it straight from the tap.
- The reason filtered water works best is that most communities use a small amount of chlorine to clean the water and that can ruin a good starter. Simply place your tap water into a jug and let it stand on the counter for a least 24 hours or up to 5 days. This allows the chlorine to evaporate off of the water.
More Bread Recipes to Make
- Treat the family to homemade Cinnamon Swirl Raisin Bread.
- Enjoy a slice of this Homemade Wheat Bread warm slathered with honey butter.
- This dense rich Challah Bread makes the best french toast!
- Make your own French Bread for hoagies and crostini.
- No-fail Easy Irish Soda Bread recipe.
- Turn mashed potatoes into this Potato Bread.
- You won’t believe how easy it is to make Beer Bread from scratch.
- Sweet Cinnamon Toffee Banana Nut Bread.
- Fry Bread from Food Network.
Thanks for visiting come back soon!
Disclosure ~ If a purchase is made using one of the affiliate links on this website we may earn a small commission at no additional cost to you. Thank you!
Helpful Kitchen Items:
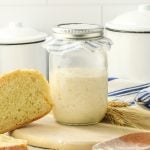
Sourdough Starter
Ingredients
- 1/2 cup whole wheat flour
- 1/4 cup room temperature filtered water or spring water
- 1/2 cup all purpose flour
Instructions
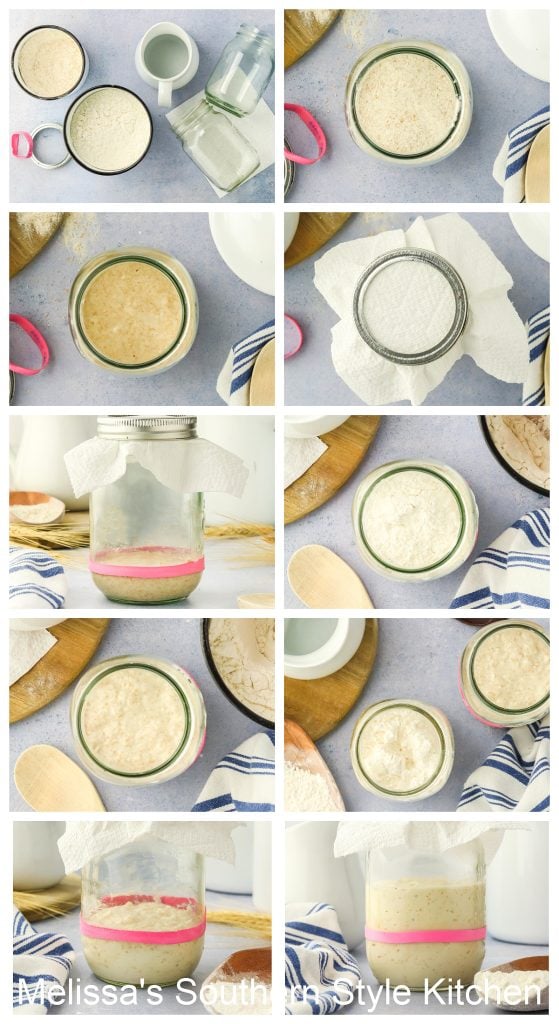
- Day One: In one of the clean jars, stir together the whole wheat flour with 1/4 cup of filtered water. It will be very thick and hard to stir when you first start but will loosen up as you are combining the two.
- Cover the top of the jar with paper towel instead of a lid to allow for air circulation. Wrap the elastic band around the jar at the line where the starter ends. This will help you know when the rise is happening in your starter. Place the jar in a warm (70-80°F or 21-27°C), dry place for 24 hours.
- Day Two: Once the 24 hours has passed, check the jar to see if the mixture has started bubbling. If it hasn’t, stir the contents and replace the paper towel and leave it for another 24 hours before feeding.
- If you do see bubbles, add 1/2 cup all purpose flour and 1/4 cup filtered water. Stir and replace the paper towel lid. Adjust your elastic band to reflect the addition of the flour. Keep in a warm spot for 24 hours. It may or may not rise at this point but will be very bubbly.
- Day Three: After 24 hours, the mixture should have bubbles. Remove 2 tablespoons of the starter and put in the clean jar. Add 1/2 cup all purpose flour and 1/4 cup filtered water to what is remaining in the jar. Stir and replace the paper towel lid. Keep in a warm spot for 24 hours.
- Day Four, Five, Six: On day 4, 5 and 6, you will follow the same process and start feeding your starter 2 times a day (every 12 hours). Remove 2 tablespoons to a clean jar and add 1/2 cup all purpose flour and 1/4 cup filtered water to the starter.
- Stir and replace your paper towel lid. Do this twice a day making sure at least 8 hours has passed since the previous feeding and the starter has fallen from the previous feeding. At this point the starter will be actively bubbling and will almost double in size after every feeding.
- At this point, your starter is ready to use. If you don’t need it right away, simply cover and place in the fridge and feed it approximately once a week. When you are ready to use it, remove it from the fridge 24-48 hours in advance, allow it to warm up to room temperature and feed it a few times to activate it.
There is no yeast listed in the ingredients?
Please read the narrative, this is how you make a sourdough starter from scratch. If you want yeast, you can purchase that on the baking aisle of the grocery store. It’s not necessary for this recipe.
It doesn’t need it, it gets natural yeast from the air
I noticed that you indicated we should remove two tablespoons of the starter and put that in a clean container. What should we do with that additional starter? Thanks
That’s the discard. If you like you can use it (once fully developed), share it or if you prefer simply dispose of it. If you share it, it will need to be fed per the recipe to develop.
I am starting form the beginning how do I start what do I need have my baking pots…all-purpose flour, Mason jars or other clean jars…..help from Chilliwack B.C Canada..
Please read the narrative for this information and you’ll be good to go.
Melissa, Can I use the filtered water stemming from the refrigerator door?
If so how long should I leave on the counter to warm up?
I can’t wait to make this absolutely love Sourdough Bread. Funny, I hated it as a kid when grandmother tried forcing on me, now I can’t get enough, LOL! Thanks for the recipe will you publish Pumpernickel & Rye breads too?
I love your Grandmother story, thanks for sharing! 🙂 Yes, you can use filtered water. You don’t have to bring it to room temperature but if it’s cold it will take longer for it begin to bloom. I will add your Pumpernickel and Rye Breads to my request file, thanks! Sourdough bread recipe is coming next week.
I thought you were supposed to use sugar also when you do the process. Why don’t you use sugar and I stay away from wheat because I’m allergic to wheat so can I just do all flour? I usually buys extra sourdough bread at the stores, but I’m curious of making my own so yes that’s why I don’t buy wheat bread! Do you also have a video of how the process works and the next step on making the actual bread?
While it’s best to use a combination, in your case you could use all plain (all purpose) flour. You can see how to make Sourdough Bread here.
When will the bread recipe be posted ??? Update: See the Sourdough Bread Recipe here.
Next week!! I wanted to give you the starter first and the bread will be published next. Update: See the Sourdough Bread Recipe here.
What do I do when I want to make bread and when
Follow the instructions for how to separate out the starter for making bread. I have a Sourdough Bread recipe coming up soon! Update: Sourdough Bread Recipe here.
OK. I love sour dough bread! Nut how do i actually make the bread & the recipe. Or, your recipe for sour dough bread? Thanks, Judy
No worries I have a Sourdough Bread recipe coming soon! Update: Sourdough Bread Recipe here.
Does it have to be wheat flour?
Can I use white flour? Thanks Aimee’
This recipe utilizes two types of flour. You can use all purpose flour with rye flour, bread flour or wheat flour.
how do you prepare the tap water for this starter?
From the Narrative: The reason filtered water works best is that most communities use a small amount of chlorine to clean the water and that can ruin a good starter. Simply place your tap water into a jug and let it stand on the counter for a least 24 hours or up to 5 days. This allows the chlorine to evaporate off of the water.
What happens if you need to go out of town and can’t take the starter with you? Do you have to start over?
A starter requires chilling when not used. You can store it (a fully developed starter)in the fridge for up to a week without feeding it. When you want to make bread with it remove it from the fridge and let it sit for a few hours then feed it again every 12 hours for 3-4 days before using it to make bread.