Ice Cream Cone Cupcakes

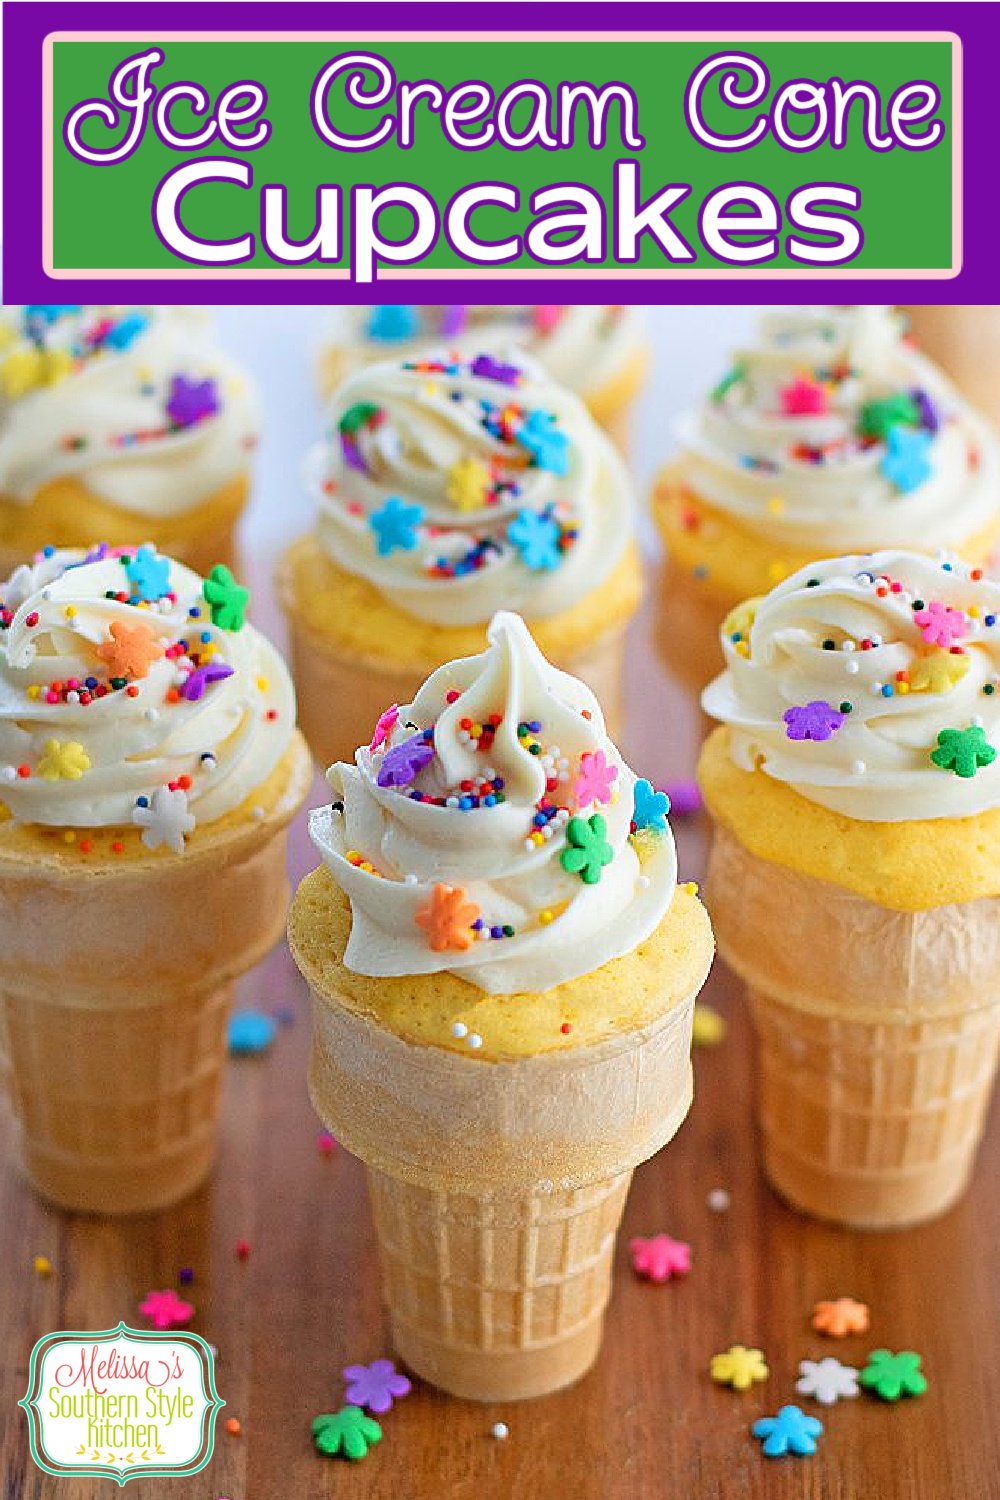
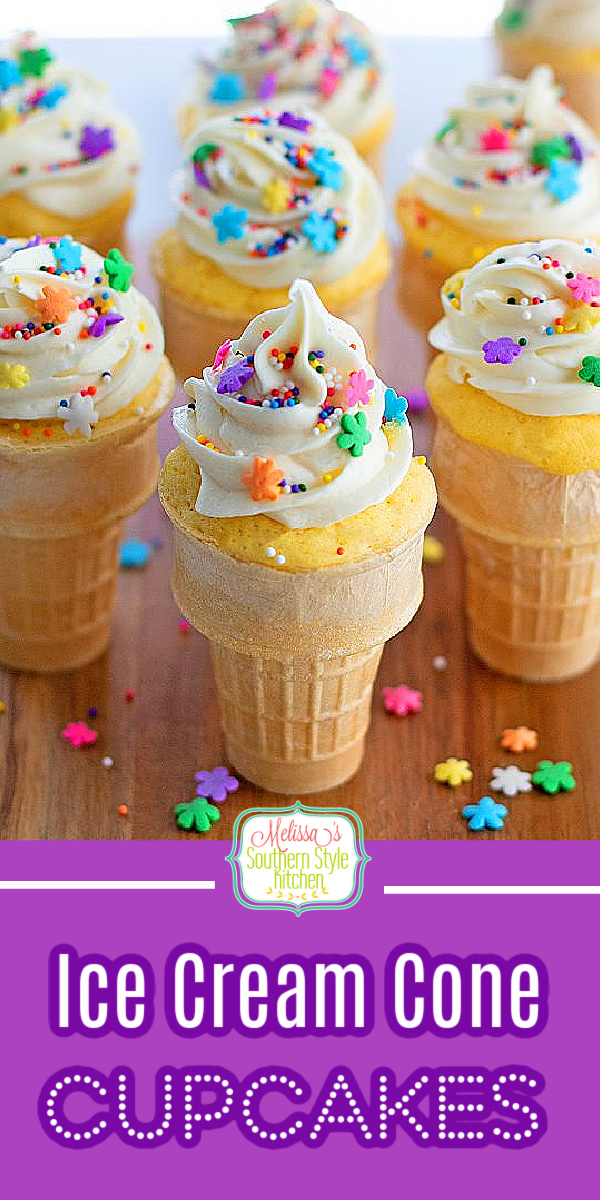

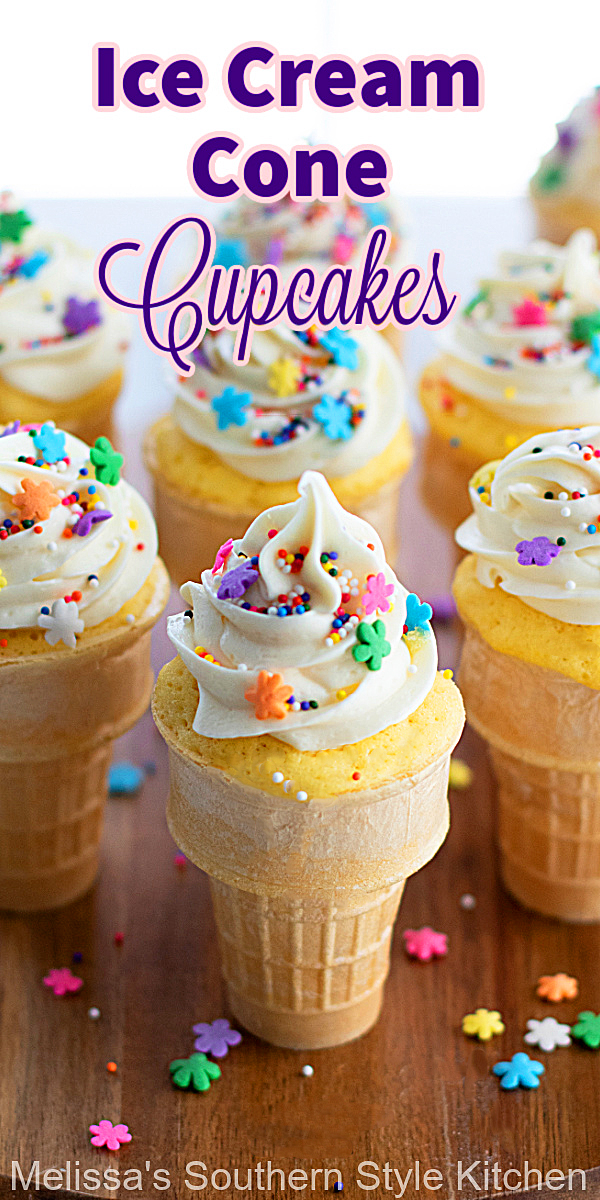
This Ice Cream Cone Cupcakes recipe is a timeless favorite loved by kids of all ages. These fun and festive cupcakes baked in ice cream cones can be made with any cake flavor you like and easily decorated for holidays, birthday parties, or any special occasion. Perfect for adding a playful twist to your dessert table!

Easy Ice Cream Cone Cupcakes Recipe
I’ve been making these fun ice cream cone cupcakes since I was a little girl, and they’ve always been a hit! This novelty dessert is not only adorable, but also totally practical,you get to eat the whole thing, cone and all, with no waste.
Over the years, I’ve seen so many fun variations of this easy dessert recipe. These cupcakes baked in ice cream cones are perfect for birthday parties, Valentine’s Day, or anytime you want to serve a playful, crowd-pleasing treat.
This version uses a classic vanilla cake mix, but you can easily switch it up with chocolate, funfetti, strawberry, or any other flavor you love. No matter which flavor of cake mix you choose, these ice cream cone cupcakes are sure to bring smiles to kids and adults alike.
Checkout this quick list of ingredients you’ll need to make simple Ice Cream Cone Cupcakes: (Scroll down for full printable recipe card.)
- Cake – One box of yellow cake mix plus water, oil and eggs called for on the package for preparing.
- Ice Cream Cones – 30 flat-bottom ice cream cones.
- Frosting – Cream cheese, butter, heavy cream, powdered sugar and vanilla extract.
- Decorations – You’ll also need colorful sprinkles or jimmies to decorate the tops.

How to Make the Best Ice Cream Cone Cupcakes Recipe
Through the years, I’ve seen several variations. Sometimes, these cupcakes are made in sugar cones, and then some bakers like to turn them upside down in muffin liners with the cone on top. They’re super cute when made that way and they bake a little wonky as if the “ice cream” a.k.a. cake batter has melted. These flat bottomed cones don’t require a special rack, but please note sugar cones will need an oven safe rack to stay upright in the oven and for displaying.
- Make the Cupcake Batter – Use an electric mixer to beat together cake mix, oil, water and eggs per the package directions.
- Heat Oven and Prepare Pans with Foil – Cover 3 standard muffin pans with foil. Cut an “x” into the center of each cup to form a holder. Arrange ice cream cones in each cup. (If you have an oven safe ice cream cone holder, skip this step)
- Fill Cones – Use a measuring cup or scoop to fill cones slightly above halfway with batter.
- Oven – Bake per the cooking time in the recipe until a toothpick inserted into the center comes back clean. Cool completely on a wire rack.
- Make Cream Cheese Frosting – Cream together cream cheese, butter, cream and vanilla with powdered sugar.
- Frost Cupcake Cones and Decorate – Frost cooled cones and decorate with jimmies or sprinkles, as desired.
- Serve immediately. These cupcakes are best eaten the day they’re made.
Kitchen Equipment to Make Ice Cream Cone Cupcakes
- A large bowl and medium bowl.
- Measuring cups and spoons.
- A hand mixer or a stand mixer to make the cupcake batter and frosting.
- Ice cream scoop for dividing the batter. You could also use a measuring cup or spoon.
- Three 12-cup standard size muffin pan covered with heavy duty aluminum foil. A cupcake pan, covered with aluminum foil, will help stabilize the cupcakes when moving in and out of the oven.
- Wire rack for cooling the cupcakes.

Recipe Variations, Tips, Tricks and Substitutions
- Cake Flavor – You can use any flavor of box cake mix you like to make your favorite kind of cake. Chocolate cupcakes, strawberry, funfetti cupcakes, lemon, red velvet or any flavor that your family enjoys.
- Cupcake Frosting – You may also opt to use premade canned frosting in various flavors. You may also opt to use a store-bought can of white frosting, chocolate frosting or any kind of frosting that goes well with the cake flavor you’re making or use various flavors.
- Scratch Cake Batter – If you’d like to make your own cake batter from scratch, see my no-fail recipe for Old Fashioned Butter Cake here.
- How Do You Keep the Cones Upright? It’s easiest to make these ice cream cupcakes with flat bottomed cones. If you cover a muffin tin with aluminum foil then use a sharp paring knife to cut a small opening, you can insert the cones into the holes to secure them for baking.
- Don’t Overfill the Cones – It may be tempting, but don’t overfill the cones. When filling the cones, think just slightly over halfway to keep the cake contained as it bakes.
- Decorating – You can have fun and decorate these to suit your taste. Top them with chopped pecans, peanuts or walnuts, English toffee bits, sprinkles, jimmies. a maraschino cherry, M&m’s, mini chocolate chips, or chopped candy bars. Use any edible decorations you like on the tops to suit the occasion.
- Piping Bag – I use a pastry bag fitted with a jumbo star tip to frost these ice cream cone cupcakes. You can also use a Ziploc bag with the corner snipped off to frost the tops. You can also go old school and frost them using an offset spatula.
Storage and Leftovers
- Leftovers – You can store them in an airtight container with a lid at room temperature the day their made. After years of making these, I think they’re best made and eaten the same day. Otherwise, when stored for an extended period of time, moisture can cause the sugar cone to become a little chewy.
- Freezer – I don’t recommend freezing ice cream cone cupcakes. The cone becomes soggy when thawed.

More Southern Cupcake Recipes to Make
upcakes appeal to everyone regardless of age. They’re tiny single serving cakes and always welcome on the dessert table. More cupcake recipes you may like to try:
- My ever popular Banana Pudding Cupcakes that are always a favorite at picnics, for tailgating and parties.
- Homemade Samoa Cupcakes are topped with toasted coconut and a drizzle of caramel.
- These Strawberry Shortcake Brownie Cupcakes are perfect for an easy and impressive single serving dessert.
- Bakery style Red Velvet Cupcakes topped with cream cheese frosting.
- Cinnamon Caramel Macchiato Cupcakes can be enjoyed with a cup of coffee or for dessert any time of day.
- Red White and Blue Cupcakes for your next Patriotic celebration.
- You may also like these Lime Cupcakes from The Novice Chef.

Thanks for visiting come back soon!
Disclosure ~ If a purchase is made using one of the affiliate links on this website we may earn a small commission at no additional cost to you. Thank you!
Helpful Kitchen Items:

Ice Cream Cone Cupcakes
Ingredients
- 1 15.25 oz box yellow cake mix plus eggs, oil and water to prepare
- 30 regular flat-bottom ice cream cones
- 1 8 oz block cream cheese softened
- 1/2 cup salted butter softened
- 2-4 Tbsp heavy cream
- 1 tsp pure vanilla extract
- 4 cups powdered sugar
- assorted jimmies and sprinkles for decorating
Instructions
- Cupcakes: Preheat oven to 350°F. In a medium size mixing bowl, use an electric mixer to beat together cake mix, oil, water and eggs as called for on package.
- Cover 3 standard muffin pans with foil. Cut an "x" into the center of each cup to form a holder. Arrange ice cream cones in each cup. (If you have an oven safe ice cream cone holder, skip this step) Use a measuring cup or scoop to fill cones slightly above halfway with batter.
- Bake for 12-15 minutes or just until a toothpick inserted into the center comes back clean. Cool completely on a cooling rack.
- Frosting: In a medium size mixing bowl, cream together cream cheese, butter, 2 Tbsp cream and vanilla. Lower the speed of mixer and gradually add powdered sugar. Add additional cream 1 Tbsp at a time to spreading consistency, if needed.
- Frost cooled cones and decorate with jimmies or sprinkles, as desired.
- Serve immediately. Cupcakes are best eaten the day they're made.
- Microwave Ice Cream Cone Cupcakes:Place 4 flat-bottom cones on a microwave safe platter or plate leaving space between.Fill halfway with cake batter.Microwave in a 1000w microwave for 60-90 seconds until a toothpick inserted into the center comes back clean. (Adjust time based on the wattage of microwave used).Cool then top with frosting and decorate.The same rule applies as baked, they're best eaten the day they're made.
Notes
- Cake Flavor – You can use any flavor of box cake mix you like to make your favorite kind of cake. Chocolate cupcakes, strawberry, funfetti cupcakes, lemon, red velvet or any flavor that your family enjoys.
- Cupcake Frosting – You may also opt to use premade canned frosting in various flavors. You may also opt to use a store-bought can of white frosting, chocolate frosting or any kind of frosting that goes well with the cake flavor you’re making or use various flavors.
- Scratch Cake Batter – If you’d like to make your own cake batter from scratch, see my no-fail recipe for Old Fashioned Butter Cake here.
- How Do You Keep the Cones Upright? It’s easiest to make these ice cream cupcakes with flat bottomed cones. If you cover a muffin tin with aluminum foil then use a sharp paring knife to cut a small opening, you can insert the cones into the holes to secure them for baking.
- Don’t Overfill the Cones – It may be tempting, but don’t overfill the cones. When filling the cones, think just slightly over halfway to keep the cake contained as it bakes.
- Decorating – You can have fun and decorate these to suit your taste. Top them with chopped pecans, peanuts or walnuts, English toffee bits, sprinkles, jimmies. a maraschino cherry, M&m’s, mini chocolate chips, or chopped candy bars. Use any edible decorations you like on the tops to suit the occasion.
- Piping Bag – I use a pastry bag fitted with a jumbo star tip to frost these ice cream cone cupcakes. You can also use a Ziploc bag with the corner snipped off to frost the tops. You can also go old school and frost them using an offset spatula.
These cupcakes look very cute,I will
Be baking them for sure.
I have made these for years but never once had it crossed my mind to make them in the microwave! Thank you for including the how to for that with the baked version, these are so good everyone should try them.
I agree, thanks Donna!