No Bake Chocolate Peanut Butter Bars
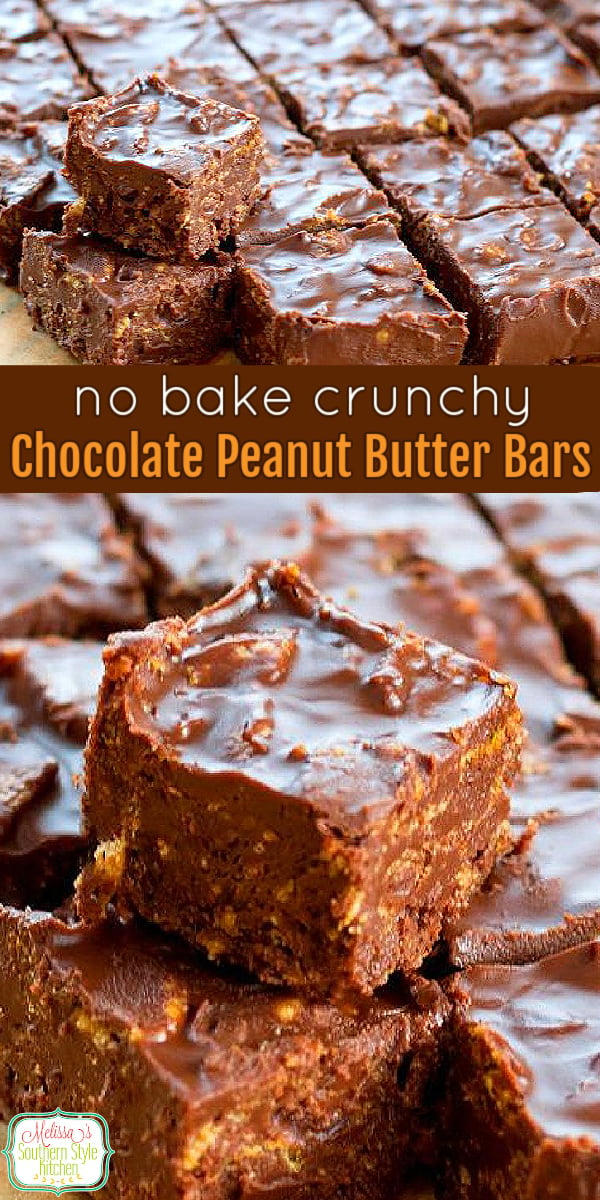
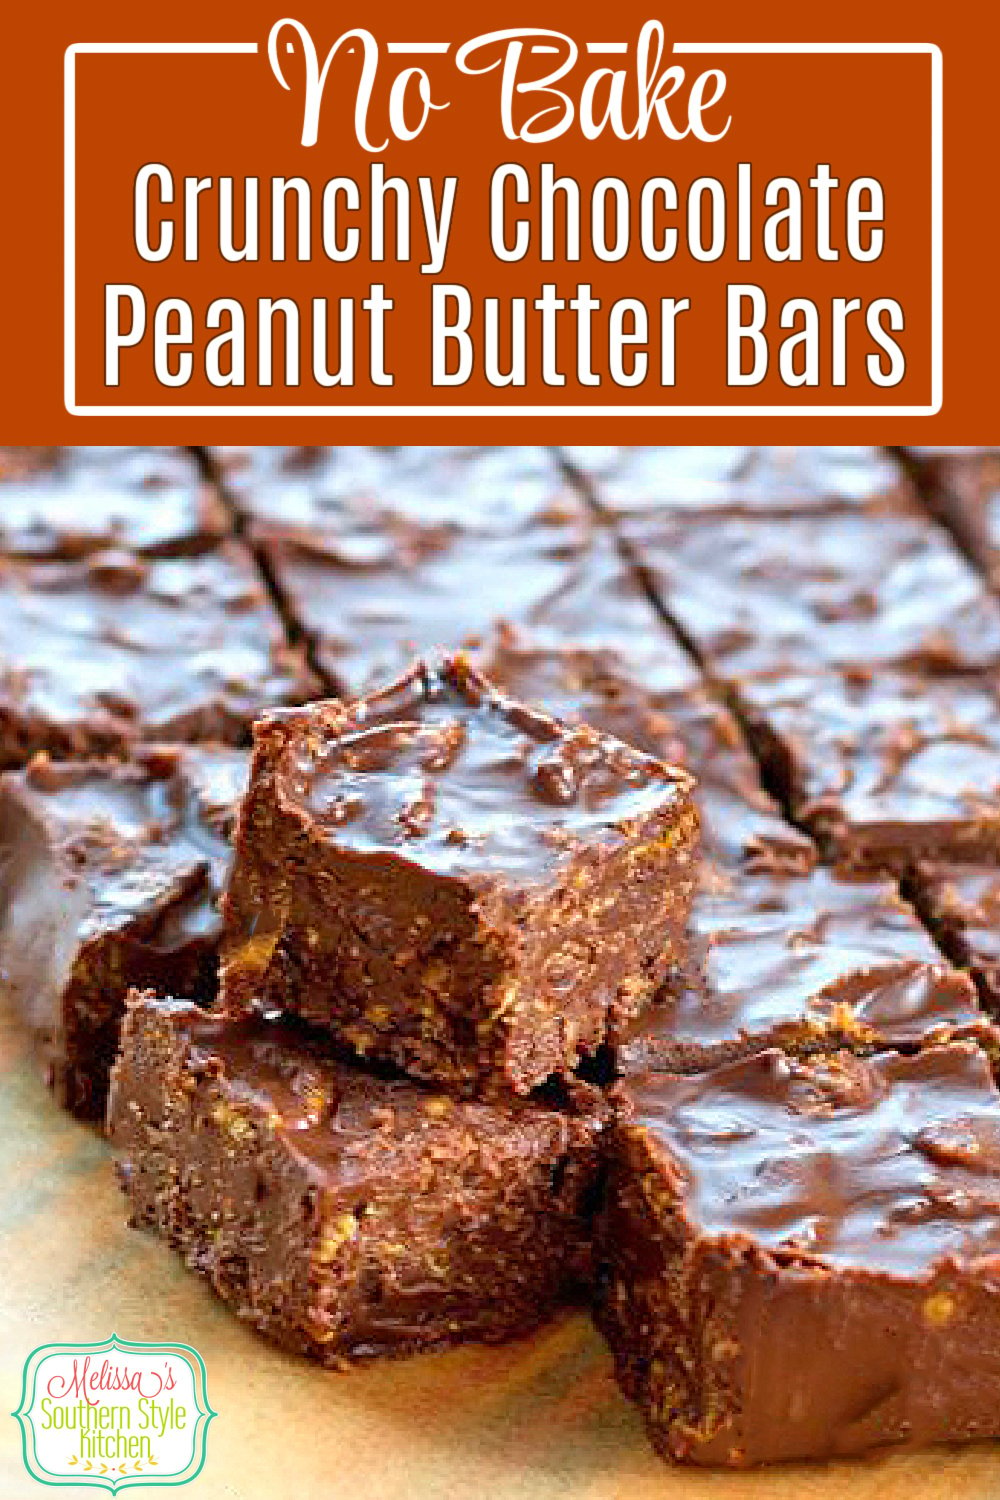
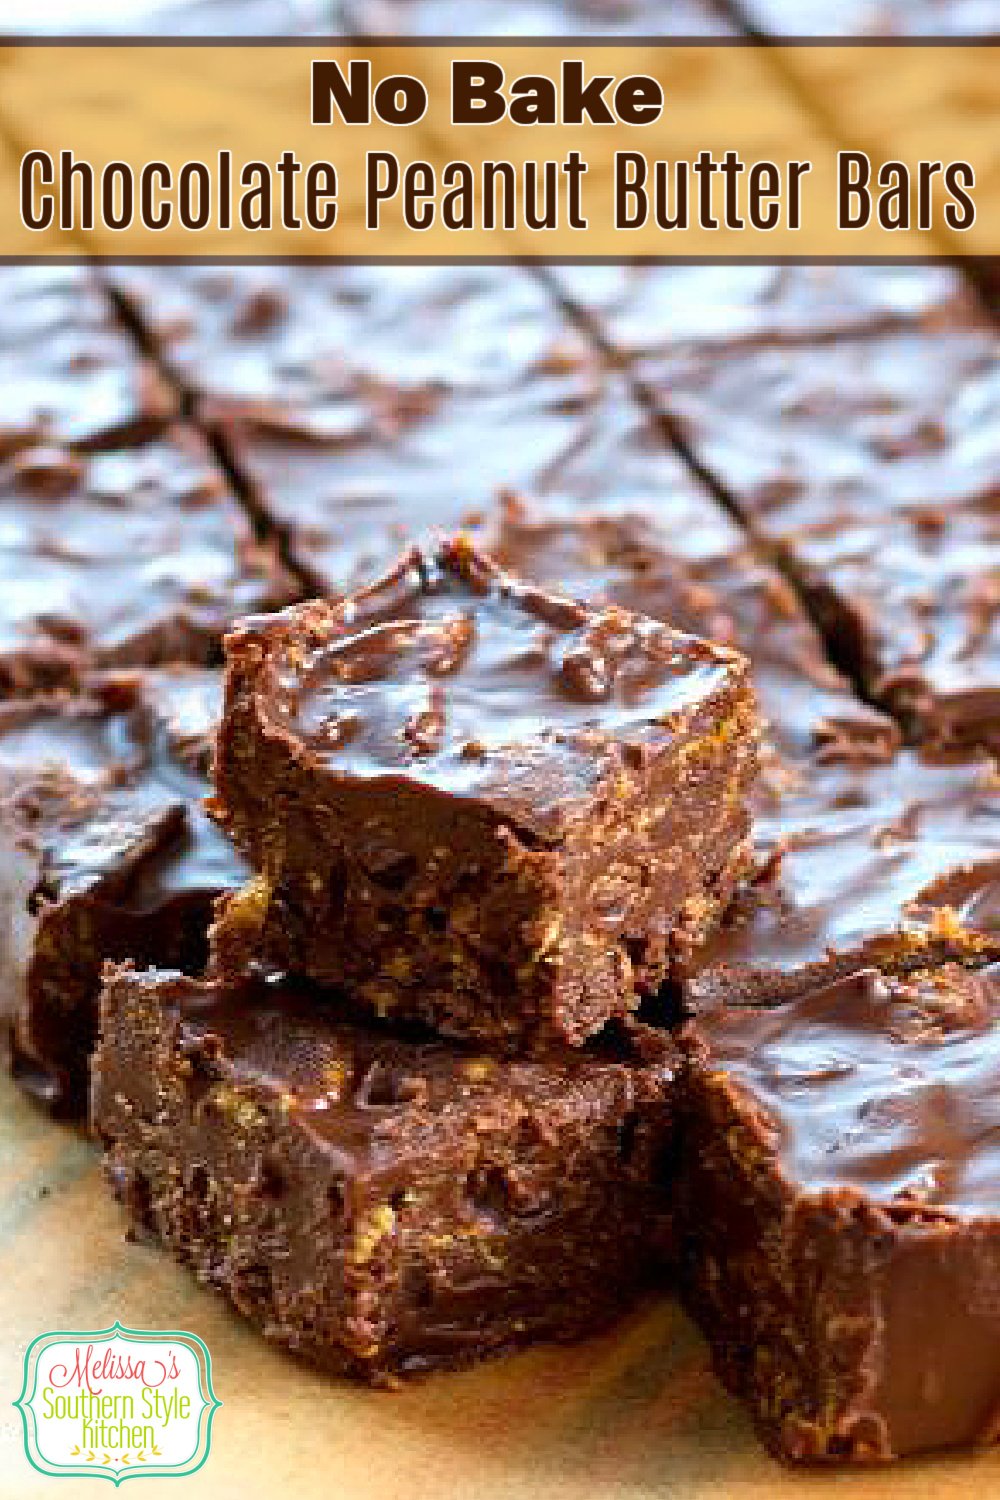
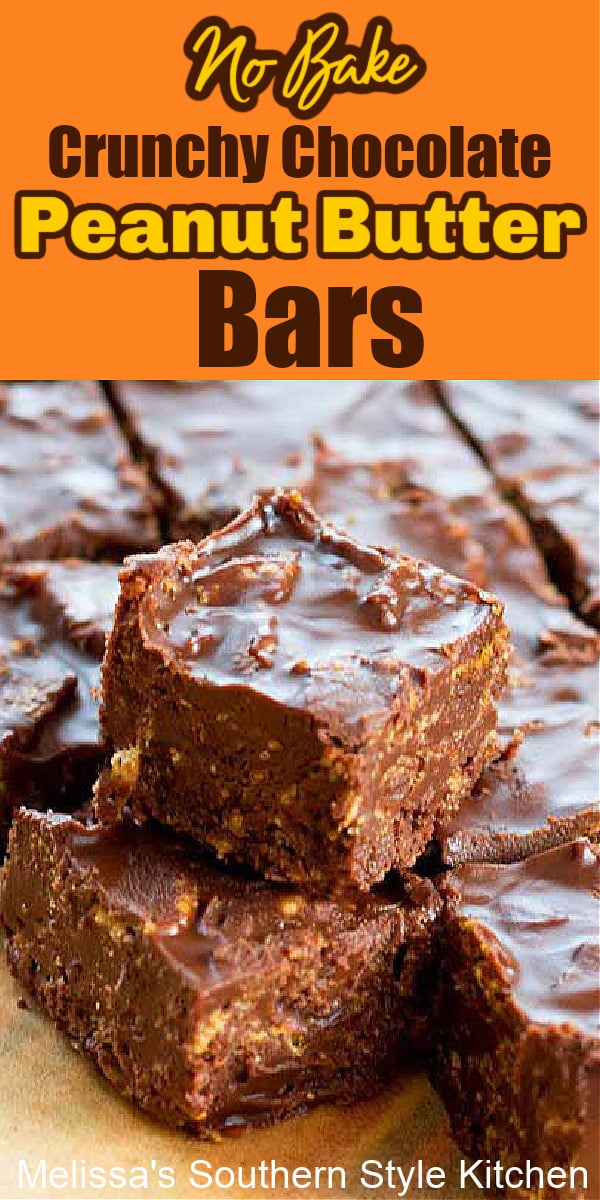
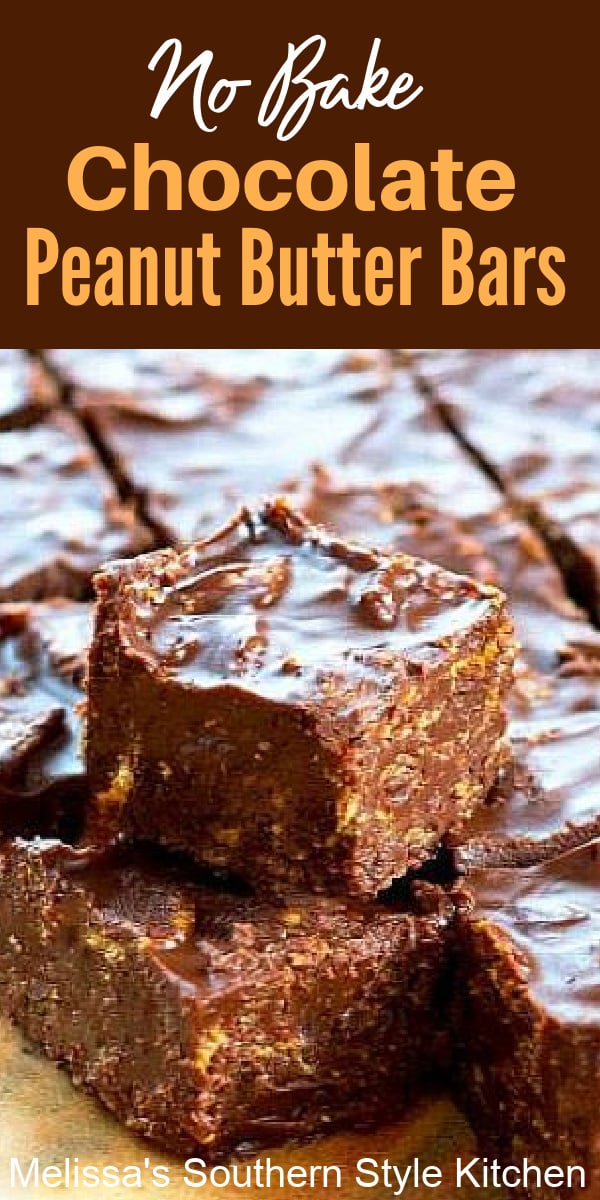
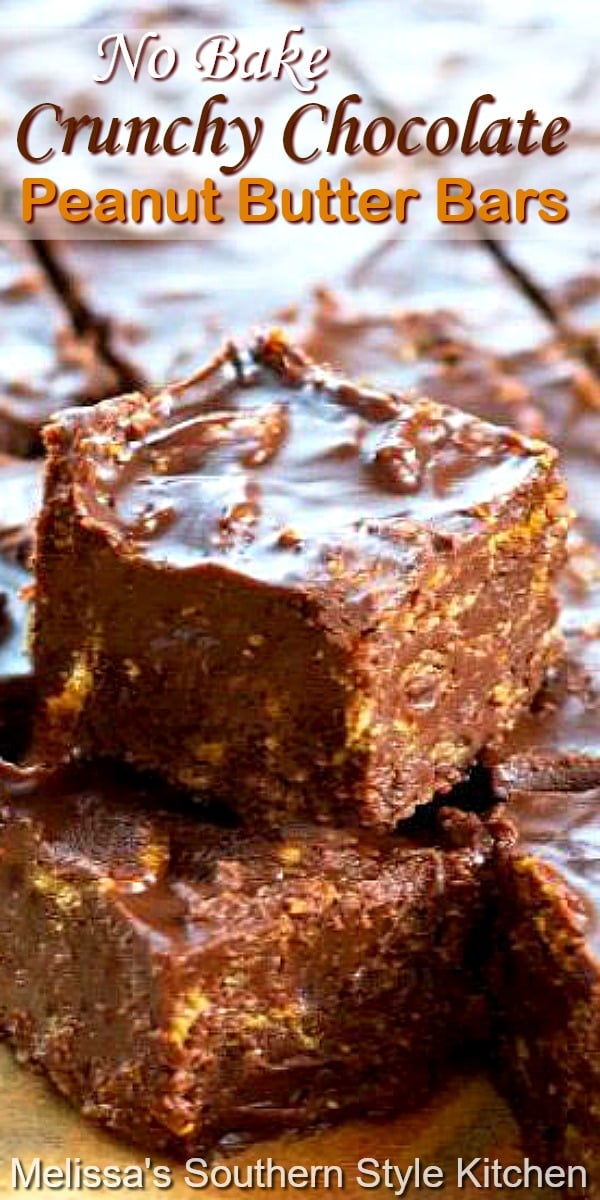
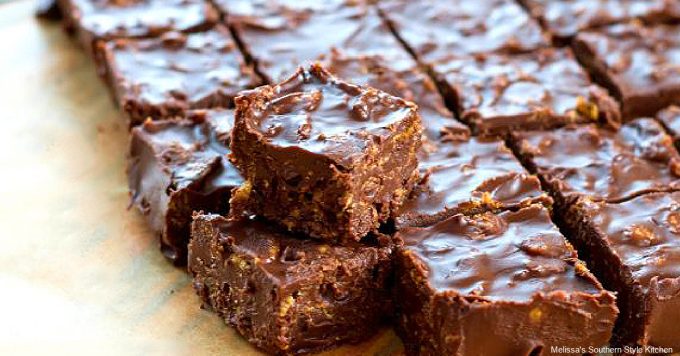
If you’re craving a sweet treat that comes together in minutes, these crunchy No Bake Chocolate Peanut Butter Bars are about to become your new go-to dessert. Made with simple pantry staples and layered with rich chocolate and creamy peanut butter, they deliver the perfect balance of salty, sweet, and crispy in every bite. Best of all, there’s no oven required, making them ideal for busy days, holiday trays, potlucks, or anytime you need an easy crowd-pleasing dessert. One bite of these irresistible bars and you’ll find yourself making them again and again.
Easy No Bake Chocolate Peanut Butter Bars Recipe
One of the best things about this recipe is how simple it is to make. These No Bake Chocolate Peanut Butter Bars come together with everyday pantry staples, no fancy ingredients or extra trips to specialty stores required. They’re the kind of easy, handheld dessert you’ll find yourself making again and again for every occasion. Perfect for game day, tailgating, picnics, holiday gatherings, or anytime quick and delicious desserts for the kids are on the menu, these homemade crunch bars are always a hit. The recipe comes from a friend’s cookbook, and I’m so excited to share it with you!
Key ingredients to make No-Bake Chocolate Peanut Butter Crunch Bars: (Scroll down for full printable recipe card and quantities.)
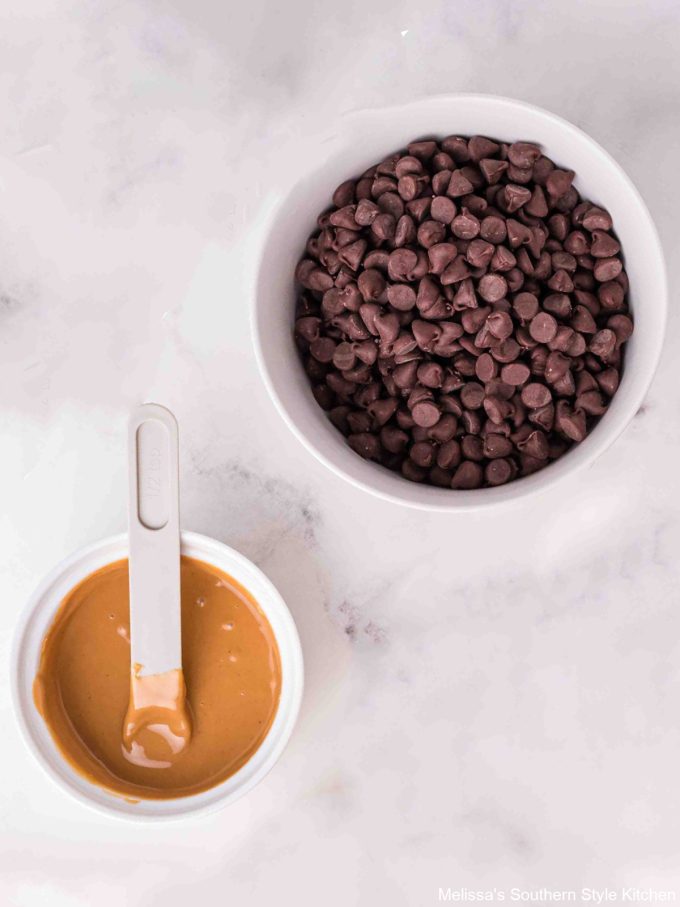
- Chocolate – Semi sweet chocolate chips form the gooey chocolate layer.
- Peanut Butter – Creamy peanut butter gives these bars their signature peanut butter chocolate flavor.
- Honey – Honey thins the chocolate and gives it a creamy texture.
- Butter – Unsalted butter for richness.
- Cereal – Classic corn flakes or frosted corn flakes.
How to Make the Best No Bake Chocolate Peanut Butter Bars Recipe
- Melt Chocolate and Peanut Butter – Place the chocolate chips, peanut butter, honey and butter in a large glass mixing bowl in the microwave, stir until the chocolate has completely melted.
- Crunchy Cornflakes – Stir-in the cornflakes. Mix until well coated.
- Prep the Pan – Line an 8 x 8-inch pan with parchment paper or wax paper leaving overhang to act as handles to remove from the pan.
- Chill – Spread the chocolate mixture evenly into the pan. Pop them into the refrigerator and chill until firm for at least 2-4 hours.
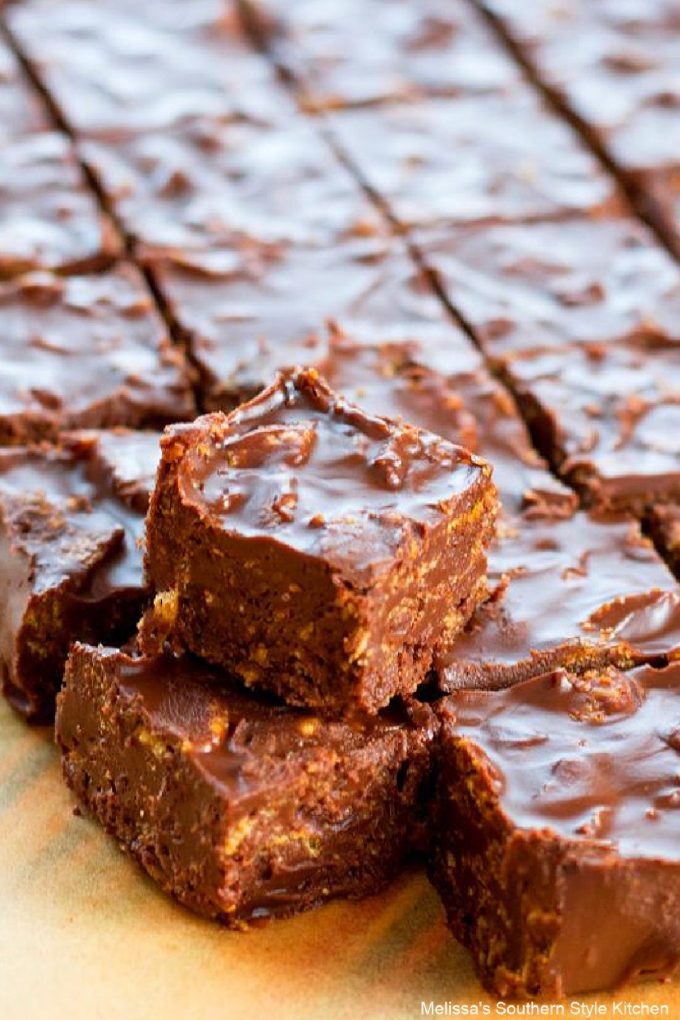
- Serving – Use a sharp knife to cut into 1-inch squares and enjoy.
Kitchen Equipment to Make No Bake Chocolate Peanut Butter Crunch Bars
- Large bowl that’s microwave safe.
- Measuring cups and measuring spoons.
- Large rubber spatula.
- 8×8-inch pan or 9×9-inch pan or baking dish lined with parchment paper.
Recipe Variations, Tips and Substitutions
- Peanut Butter – You could use crunchy peanut butter or an alternate nut butter like almond butter.
- Chocolate – You can use milk chocolate chips or dark chocolate chips.
- Nuts – You could add a sprinkling of chopped salted peanuts on top as a garnish. Sprinkle the top while the chocolate is wet so it will stick.
- Salt – There’s ample salt in the peanut butter and cereal making it unnecessary to add more. You could adjust this to your taste.
- Create Handles for Easy Removal from Pan – When lining the pan, it’s helpful to leave overhang to allow you to easily lift the bars from the pan for cutting.
- Stovetop Method – If you don’t have a large microwave safe bowl, you can melt the chocolate chips, peanut butter, honey and butter in a double boiler or heavy bottomed saucepan and then pour the chocolate mixture over the cereal in a large mixing bowl.
- Cereal – You can also make these bars with frosted cornflakes, rice krispies or a store brand of crispy rice cereal you enjoy. Any similar size crunchy cereal or gluten-free cereal should work.
- Honey – You can use light corn syrup in place of honey for these bars, if desired. You could also use maple syrup for a flavor twist.
- Use a Nonstick Rubber Spatula – A large nonstick silicone spatula will be your best friend when mixing these bars with the chocolate peanut butter mixture.
- Spread Evenly – It’s important to spread the chocolate peanut butter mixture evenly in the pan so they will be uniform thickness.
Storage and Leftovers
- Leftovers – Store these bars in an airtight container at room temperature for up to 5 days or chilled in the refrigerator for up to 2 weeks.
- Use Wax Paper When Stacking – When stacking, separate layers with wax paper to prevent them from sticking together.
- Freezer – You can freeze these crunch bars in a freezer safe container for up to 3 months. Thaw in the fridge and enjoy.

More No Bake Dessert Recipes to Make
If no fuss desserts are your jam, I’ve got you covered! More easy dessert recipes you may also like to try:
- No-Bake Chocolate Peanut Butter Oatmeal Cookies have one thousand names and every one spells delicious.
- Peanut Butter Mallow Bars are a nostalgic treat I’ve never outgrown.
- No Bake Banana Pudding Pie is impossible to resist.
- Potato Chip Clusters are fun for holidays and special gatherings.
- Chocolate Peanut Butter Lasagna will delight the peanut butter cup fans in your life.
- Butterscotch Rice Krispies Treats are a grown-up rice krispies treat you’ll love.
- No Bake Cherry Cheesecake is a cinch to make.
Thanks for visiting come back soon!
Disclosure ~ If a purchase is made using one of the affiliate links on this website we may earn a small commission at no additional cost to you. Thank you!
Helpful Kitchen Items:
No Bake Chocolate Peanut Butter Bars
Ingredients
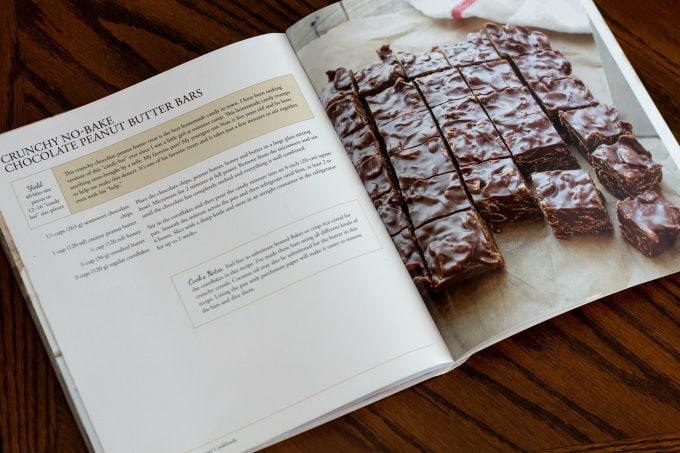
- 1 1/2 cups semi-sweet chocolate chips
- 1 cup creamy peanut butter
- 1/2 cup honey
- 1/4 cup unsalted butter
- 3 cups regular or frosted cornflakes
Instructions
- Line an 8×8-inch pan or 9×9-inch pan with parchment paper or wax paper leaving 1-2 inches overhang to form "handles". Set aside.
- Place the chocolate chips, peanut butter, honey and butter in a large glass mixing bowl.
- Microwave for 2 minutes on full power.
- Remove from the microwave and stir until the chocolate has completely melted and everything is well combined.
- Stir-in the cornflakes. Mix well. Spread the chocolate mixture evenly into the pan.
- Pop the pan into the refrigerator and chill until firm for at least 2-4 hours.
- Use a sharp knife to cut into o1-inch squares and enjoy.
- Store chilled in the refrigerator in an airtight container for up to 2 weeks.
Notes
- Peanut Butter – You could use crunchy peanut butter or an alternate nut butter like almond butter.
- Chocolate – You can use milk chocolate chips or dark chocolate chips.
- Nuts – You could add a sprinkling of chopped salted peanuts on top as a garnish. Sprinkle the top while the chocolate is wet so it will stick.
- Salt – There’s ample salt in the peanut butter and cereal making it unnecessary to add more. You could adjust this to your taste.
- Create Handles for Easy Removal from Pan – When lining the pan, it’s helpful to leave overhang to allow you to easily lift the bars from the pan for cutting.
- Stovetop Method – If you don’t have a large microwave safe bowl, you can melt the chocolate chips, peanut butter, honey and butter in a double boiler or heavy bottomed saucepan and then pour the chocolate mixture over the cereal in a large mixing bowl.
- Cereal – You can also make these bars with frosted cornflakes, rice krispies or a store brand of crispy rice cereal you enjoy. Any similar size crunchy cereal or gluten-free cereal should work.
- Honey – You can use light corn syrup in place of honey for these bars, if desired. You could also use maple syrup for a flavor twist.
Could I maybe use something else besides honey? Because honey makes my mouth swell up.
You could try maple syrup, Karo corn syrup or agave nectar. Of course, the flavor may change slightly.
Huge hit with the crowd! Making more tomorrow, they’re so good!
Thank you for fast, easy, and delicious!
Thanks so much!
These are RIDICULOUS!!! Taste just like PB cups!!!
Can I use almond butter instead of peanut butter? I can’t eat peanuts.
I haven’t tested it specifically, but I think you could adapt it, sure.
I made this for my brother when he came to visit and he absolutely loved them! Thank you for the recipe
Could you use a different cereal or even oatmeal?
You could use Rice Krispies. I haven’t tested oatmeal.
These are so delicious 😋 I love the peanut butter and chocolate combo. Thanks so much for the recipe 😊
I’m so happy you enjoyed them, thank you!
Can this recipe be doubled for a 13×9 baking pan?
Yes, you can double it.
This looks very good please send me the website thank you
Great recipe, thank you so much for sharing. Anyone having a problem melting their chocolates chips should try buying the mini chocolate chips, they melt super fast.
Thanks so much! They do melt easily and I also find that some brands do better than others due to varying amounts of the stabilizer used to help the chocolate keep it’s shape while baking.
AWSOME is all I have to say.😀
Thank you!
This looks delicious, thank you for sharing!
This took less than 5 minutes to make! Whaaaat?! So good. I used crunchy peanut butter for even more texture. Deeeelish
Awesome, thanks so much!
simple and delicious!
Thanks so much!
Before I try to make these, the instructions say to use an 8×8 pan and
it says: Author: Melissa Sperka
Serves: 48
Does an 8×8 pan serve 48? How big are the pieces?
The picture you show in your cookbook, looks like
30 pieces…just wondering if you double the recipe and
use a 9×13 pan. Thank You!
You cut these into 48 (1-inch) pieces. This recipe is a review I did for another Authors cookbook. If you want to cut it into bigger pieces, you can. Serves 48 and 48 servings are two different things. And yes, you could do a double batch, sure.
Delicious recipe, thank you! Would it be possible to make it ahead of time and freeze it?
Thank you.
I’ve never frozen these but, my thought is you probably could.