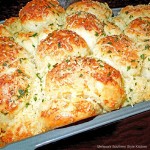
Garlic Parmesan Pull Apart Bread

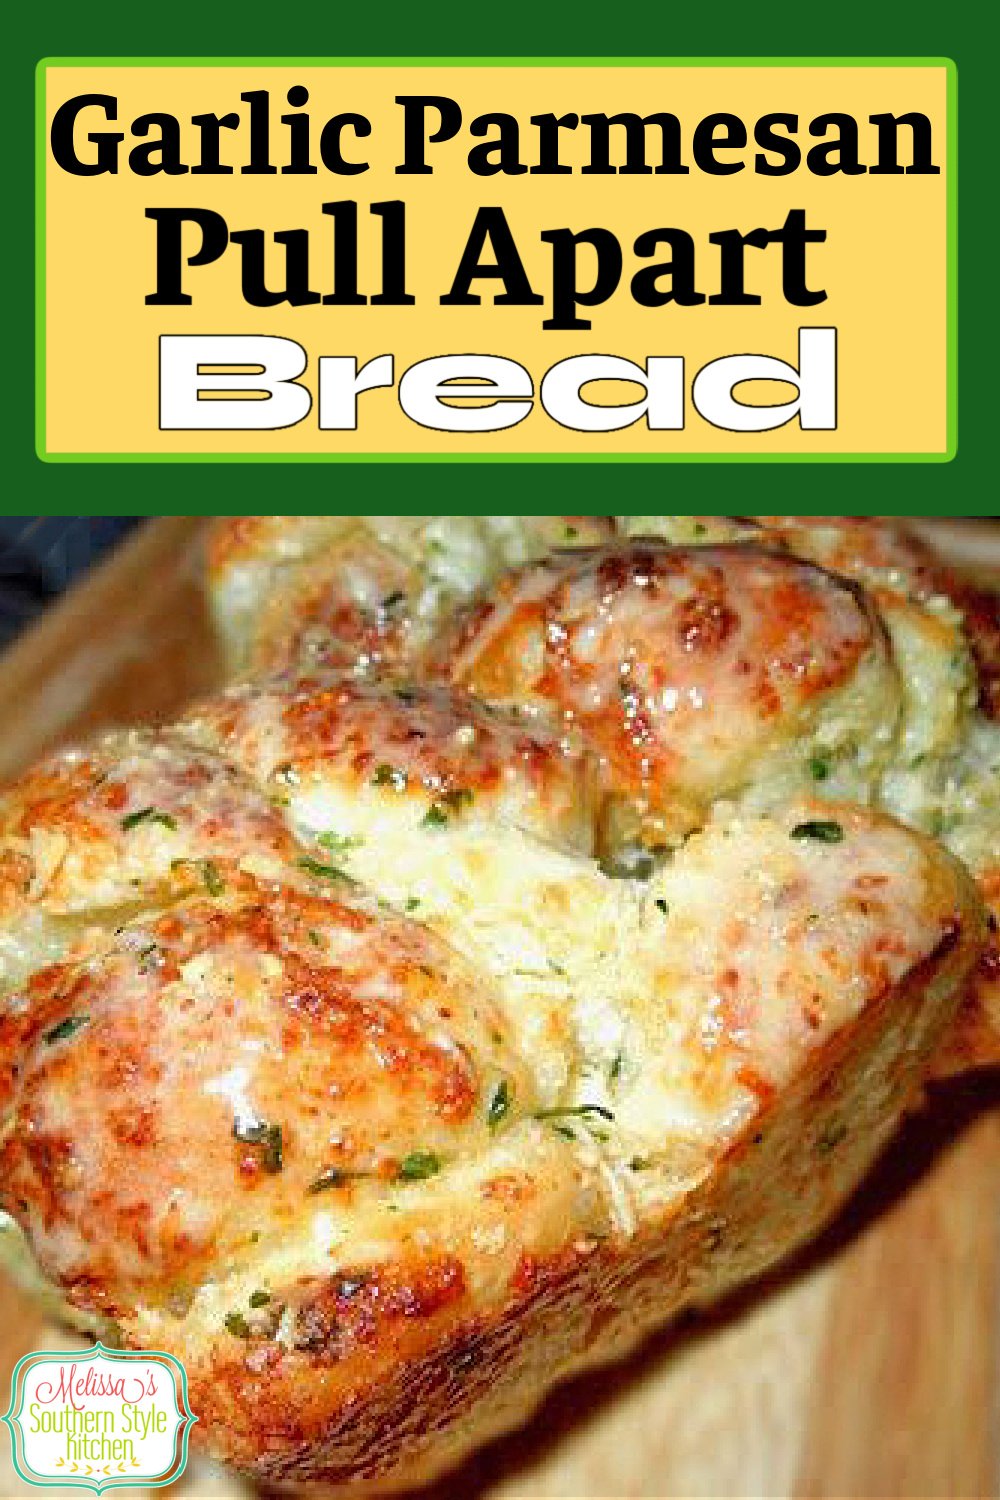
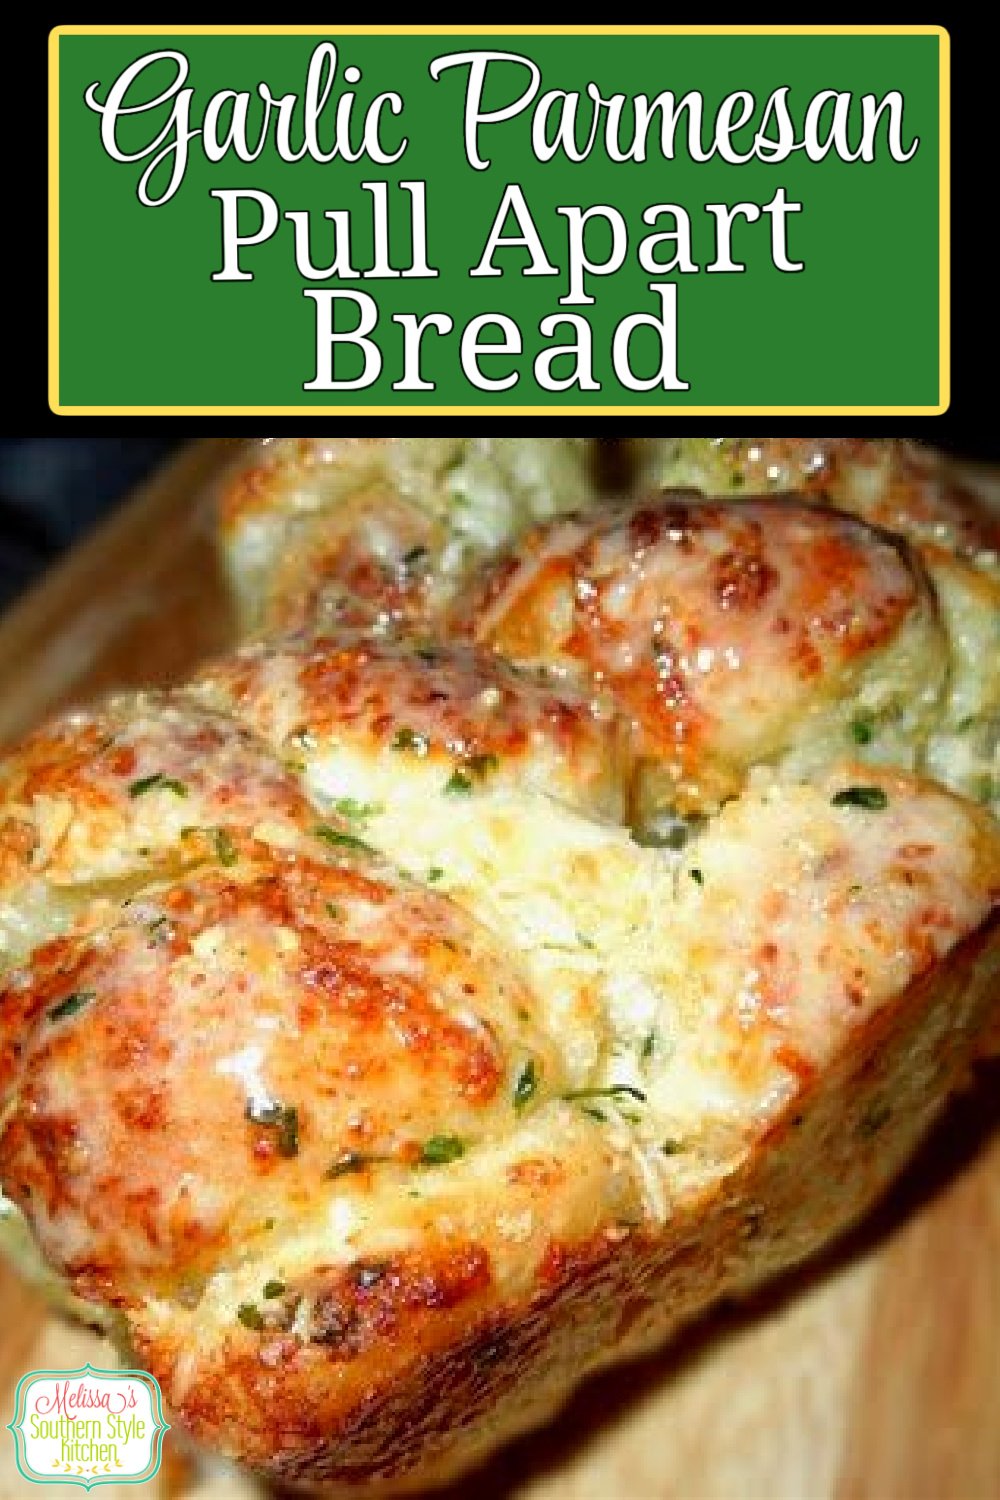
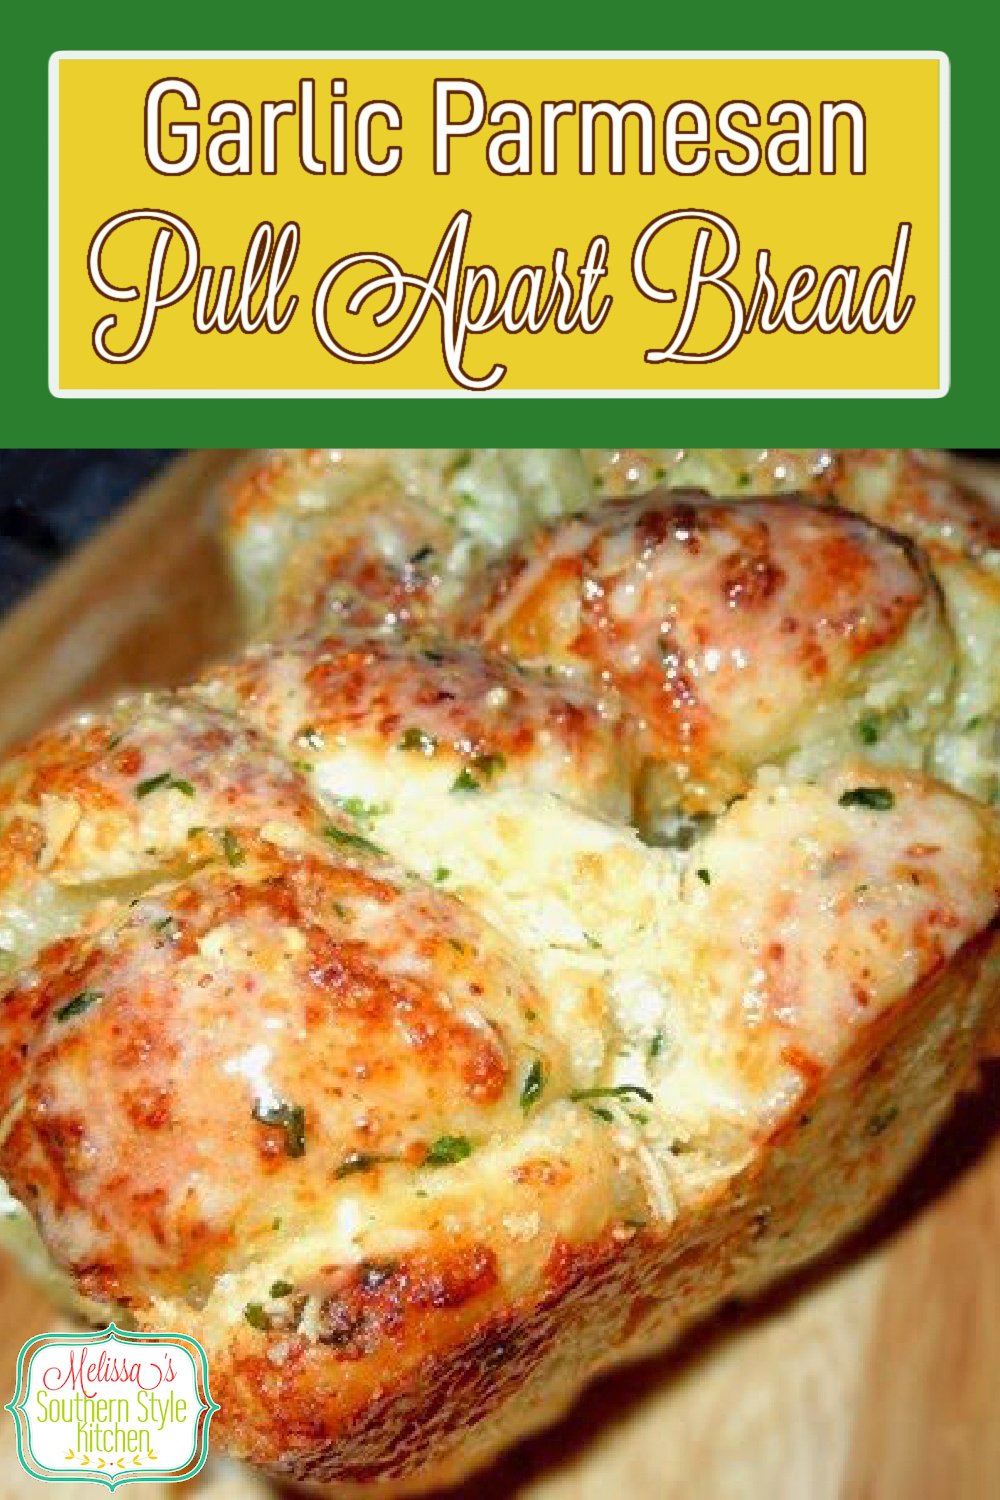
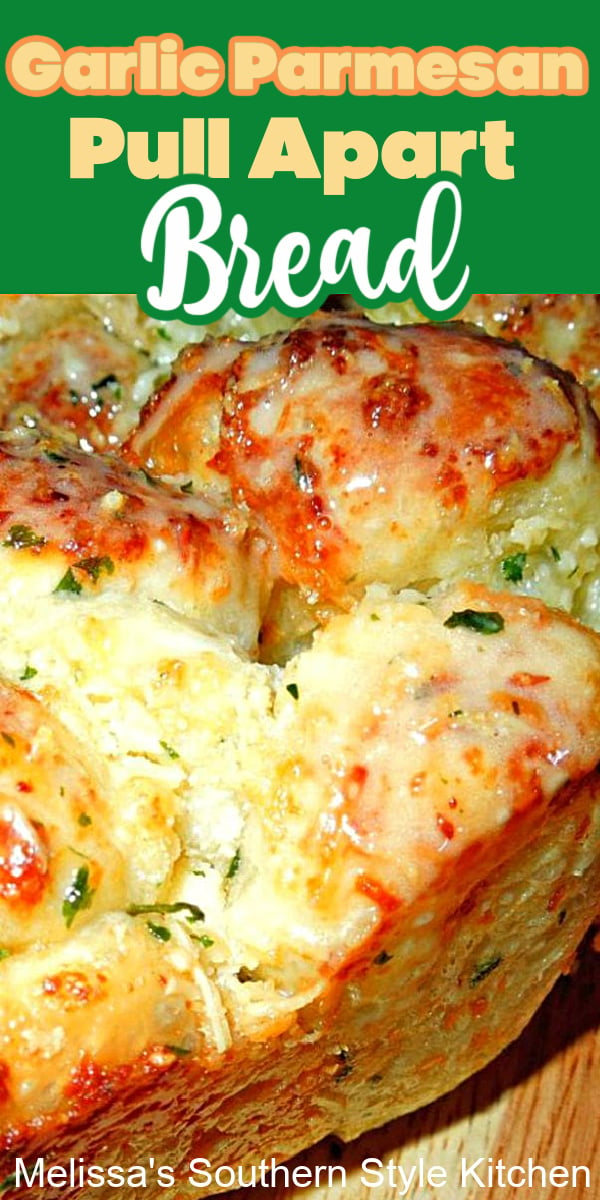
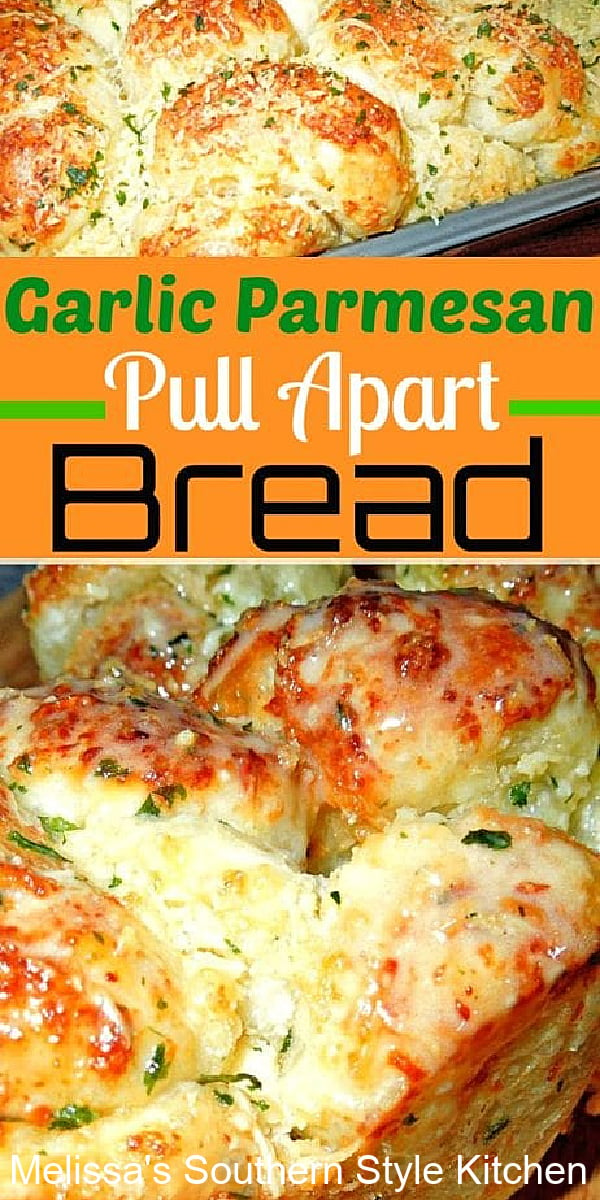
This Garlic Parmesan Pull Apart Bread is the savory, irresistible cousin of classic monkey bread. Made with frozen dinner rolls, each piece is drenched in buttery goodness and generously coated with Parmesan cheese and garlic. Whether baked in a bundt pan, skillet, or loaf pan, this pull-apart bread delivers flavor in every bite and is guaranteed to be a crowd-pleasing appetizer or side dish for family dinner.

Ingredients to Make Garlic Parmesan Pull Apart Bread Recipe
If you’re looking for a delicious garlic bread recipe without making homemade bread, this recipe is for you. When I make this Garlic Parmesan Pull-Apart Bread, I love baking it in a loaf pan, it looks just like a regular loaf of bread, but way more fun to eat. That said, you can bake it in any shape you like, there’s no wrong way to enjoy cheesy, garlic bread! And when it comes to Parmesan, the sky’s the limit so pile it on, if you’re feeling extra! Serve it straight from the oven, golden brown and bubbly, with a buttery brush on top for that drool-worthy shine.
Checkout this quick list of ingredients you’ll need to make easy Garlic Parmesan Pull Apart Rolls: (Scroll down for full printable recipe card.)
- Dough – 16 frozen unbaked white dinner rolls i.e. Rhodes rolls or a similar brand from the grocery store, forms the base of the bread.
- Butter – Melted unsalted butter gives the breads a rich flavor.
- Cheese – Finely grated Parmesan-Romano cheese.
- Seasonings – Dry parsley flakes, granulated garlic or garlic powder, salt, dried basil or Italian seasoning and onion powder.

How to Make Easy Garlic Parmesan Pull Apart Bread Recipe
- Thaw the Rolls – Remove the frozen dinner rolls from the freezer and allow to sit on the counter just until they have thawed enough to cut. Use a sharp knife to quarter.
- Make the Seasoned Garlic Butter – Melt butter in a medium-size (or large) microwave safe bowl using the melt function. Once melted, add granulated garlic, parsley, salt, basil and onion powder. Mix well. Add the quartered rolls to the butter, and toss gently to coat.
- Coat Balls of Dough with Parmesan Cheese – Add Parmesan-Romano cheese to the balls of bread dough. Gently stir until each piece is evenly coated.
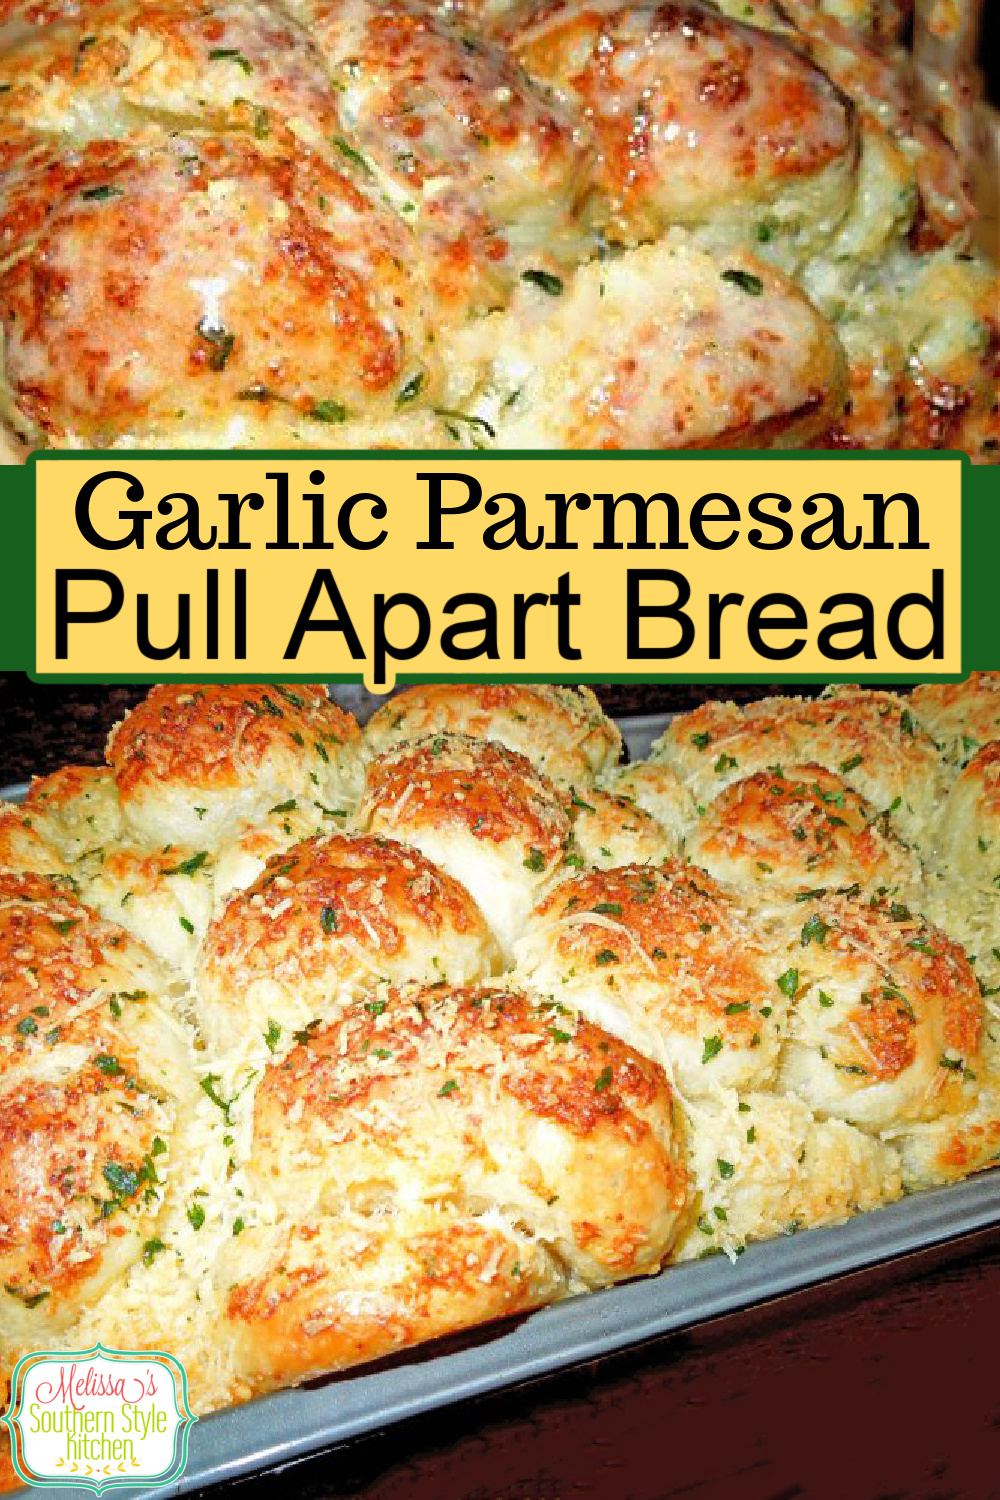
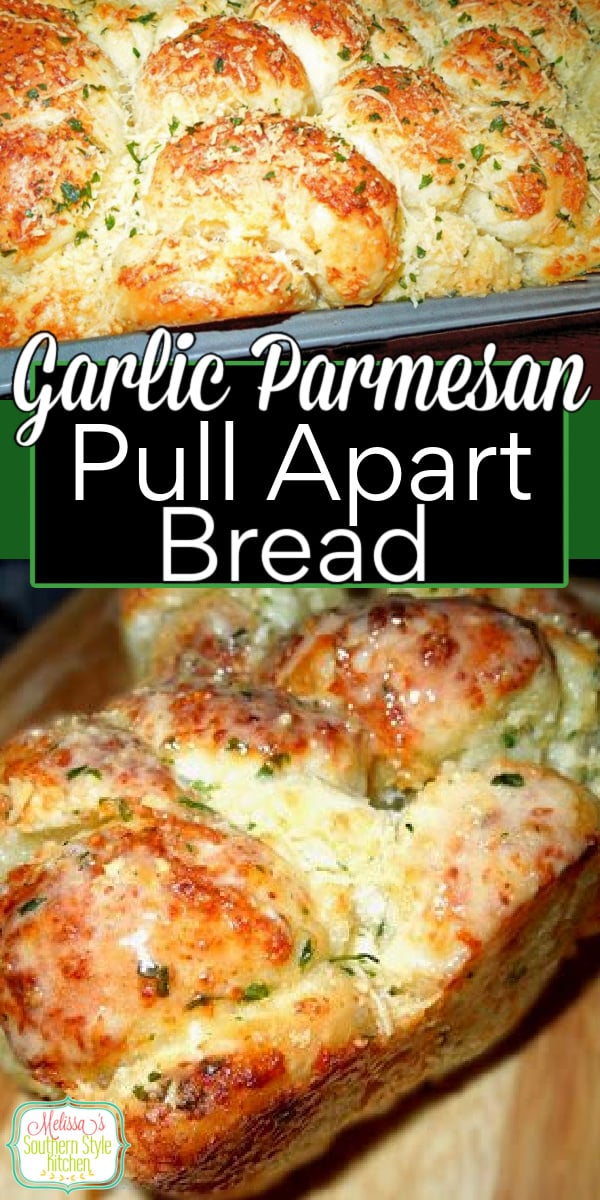
- Layer the Rolls in the Prepared Pan – Spray a large loaf pan with cooking spray. Layer the dough quarters evenly in the pan. Sprinkle the remaining cheese on top.
- Let Rise – Cover the pan loosely with plastic wrap and let rise.
- Oven – Remove plastic wrap and bake in a preheated oven per the recipe until the center is completely done.
- Brush top with herb butter and serve.
Kitchen Equipment to Make Garlic Parmesan Bread
- One 9-inch or 10-inch loaf pan.
- Measuring cups and spoons.
- Sharp knife and cutting board to prep the rolls dough.
- Pastry brush for brushing butter on the top of the tolls.
- Cheese grater for finely grating the cheese.
- One Large Bowl for melting the butter. I’m all about saving time in the kitchen so I like to use a large bowl for melting the butter and it can double as the mixing bowl.

Recipe Variations and Substitutions
- Frozen Rolls – Feel free to use your favorite brand of unbaked frozen dinner rolls for this recipe, just make sure they’re the raw dough kind, not the heat-and-serve variety. Want a shortcut? You can swap in canned biscuits instead, no rising time needed and still totally delicious!
- Butter – You can use salted or unsalted butter. I typically recommend using unsalted as the Parmesan cheese will add plenty of saltiness to the flavor.
- Garlic Cloves – You could add 1-2 minced garlic cloves to amp up the flavor even more.
- Herbs – You can easily swap in fresh parsley or chives for the dried parsley if you prefer. That said, dried herbs work beautifully in this recipe and bring plenty of flavor to the garlic-herb butter.
- Thaw the Rolls Slightly – The dough will start to thaw quickly, so it’s important to let it soften just enough to make cutting it into quarters easier. It should still be cold to the touch—don’t wait too long, or it will begin to rise, which can affect how the bread bakes.
- Serving Suggestions – Serve these rolls as a savory side dish, especially alongside classics like soup, pasta, stew, baked ziti, lasagna or spaghetti.
- Serve as an Appetizer – They also make a fantastic appetizer or snack, perfect for dipping into warm marinara or pizza sauce or a light drizzle of honey for a sweet and savory twist.
- Use with Dips – Fresh from the oven, this warm bread is irresistibly delicious with any meal, but it really shines at parties when paired with dips like creamy spinach artichoke dip or marry me chicken dip. Don’t be surprised if it starts disappearing the moment you set it out!
Alternate Shapes and Pans
- Loaf Pan – This pull-apart bread is best baked in a 9 or 10-inch loaf pan. Alternatively, you can divide the dough between two standard 8-inch loaf pans to make smaller loaves. Just keep in mind that smaller loaves will bake faster, so be sure to adjust the baking time accordingly.
- Alternate Pan – If you’re someone who loves for all of the rolls to have that crispy golden top, I highly recommend making the pull apart rolls in 9-inch round spring form or 10-inch pie pan, 8-inch tart pan or a 10-inch cast iron skillet.
- Additional Baking Options – Bake this bread in a bundt pan like monkey bread, individual size in a standard size muffin pan (4 pieces in each well baking for 20-25 minutes) or a square 8×8-inch baking dish.
Storage and Leftovers
- Leftovers – Store leftover Garlic Parmesan Pull Apart Bread in an airtight container or wrapped in foil chilled in the refrigerator for up to 3-4 days.
- Reheating – Gently reheat rolls in individual servings in the microwave or in a preheated 350°F oven just until heated through.
- Freezer – You can freeze leftovers for 1-2 months. Thaw in the fridge and reheat just before serving.

More Easy Rolls and Bread Recipes to Make
Looking for more pull apart bread to enjoy?
- Pull Apart Pepperoni Breadsticks are always a hit with the kiddos.
- Chicken Bacon Ranch Pull Apart Rolls have been pinned more than 1 million times!
- Pull Apart Cinnamon Sugar Breadsticks come with a dreamy cream cheese dip.
- Pull Apart Sausage Egg and Cheese Rolls for a delicious brunch option.
- Use a fluffy inexpensive loaf of bread to make this Supreme Pizza Pull Apart Bread.
- For dessert serve Praline Pecan Monkey Bread dripping with caramel sauce.
- Italian Sausage Bubble Bread is perfect for snacking or entertaining.
- For a sweet pull apart bread option, checkout this recipe for Praline Pull Apart Bread from My Recipes.
Thanks for visiting come back soon!
Disclosure ~ If a purchase is made using one of the affiliate links on this website we may earn a small commission at no additional cost to you. Thank you!
Helpful Kitchen Items:
Garlic Parmesan Pull Apart Bread
Ingredients
- 16 frozen white dinner rolls i.e. Rhodes or similar
- 1/2 cup butter melted
- 1 tsp granulated garlic or garlic powder
- 1 tsp dry parsley flakes
- 1/2 tsp salt
- 1/2 tsp dried basil or Italian seasoning
- 1/2 tsp onion powder
- 2/3 cup grated Parmesan-Romano cheese, plus 1/4 cup divided use
- 2 Tbsp salted or unsalted butter melted
- 1 Tbsp chopped fresh Italian parsley
Instructions
- Rolls: Remove the frozen dinner rolls from the freezer and place onto a plate. Cover loosely with plastic wrap and allow the rolls to sit at room temperature on the counter for 15-minutes, or just until thawed enough to quarter.
- Place the balls of dough onto a cutting board, and using a sharp knife cut each roll into quarters.
- Melt butter in a large microwave safe bowl using the melt function. Once melted, add granulated garlic, parsley, salt, basil and onion powder. Stir to combine.
- Add the quartered pieces of dough to the garlic-herb butter, and toss gently to coat.
- Cheese: Add 2/3 cup of grated Parmesan-Romano cheese to the balls of dough. Gently toss until each piece is evenly coated.
- Let Rise: Liberally spray a large 9 or 10-inch loaf pan with nonstick cooking spray. Layer the dough quarters evenly in the pan. Sprinkle the remaining 1/4 cup Parmesan Romano cheese on top.
- Cover the pan loosely with plastic wrap that has been sprayed with cooking spray.
- Allow to rise in a warm draft free place for 2-2 1/2 hours.
- Bake: Remove plastic wrap and preheat the oven to 350°F. Bake for 18-20 minutes, then check the top. Lay a piece of aluminum foil on the top of the bread to prevent the cheese and butter on top from overbrowning.
- Continue to bake the bread for another 5-7 minutes or until the center is completely done and the top is golden brown. (Approximately, 23-25 minutes total, depending on your oven.)
- Test the center of the rolls using a cake tester, or toothpick to be certain the bread is cooked all the way through before removing from the oven.
- In a small bowl melt 2 Tbsp butter in the microwave. Add fresh parsley, stir to combine.
- Brush top of the rolls with butter mixture then pull apart and serve.
- To Make in a Springform Pan:Follow the same preparation method as listed in the recipe.Liberally spray a 9 or 10-inch springform pan with nonstick cooking spray. Arrange rolls side by side in the pan. Bake for about 22-24 minutes or until the tops are golden brown and the rolls are cooked through.You can also increase the Parmesan cheese a bit, if desired. Whether you bake this in a loaf pan or a springform pan, brush the top with extra butter at the end.
Notes
- Frozen Rolls – Feel free to use your favorite brand of unbaked frozen dinner rolls for this recipe, just make sure they’re the raw dough kind, not the heat-and-serve variety. Want a shortcut? You can swap in canned biscuits instead, no rising time needed and still totally delicious!
- Butter – You can use salted or unsalted butter. I typically recommend using unsalted as the Parmesan cheese will add plenty of saltiness to the flavor.
- Garlic Cloves – You could add 1-2 minced garlic cloves to amp up the flavor even more.
- Herbs – You can easily swap in fresh parsley, thyme, rosemary or chives for the dried parsley, if you prefer. That said, dried herbs work beautifully in this recipe and bring plenty of flavor to the garlic-herb butter.
- Thaw the Rolls Slightly – The dough will start to thaw quickly, so it’s important to let it soften just enough to make cutting it into quarters easier. It should still be cold to the touch—don’t wait too long, or it will begin to rise, which can affect how the bread bakes.
- Loaf Pan – This pull-apart bread is best baked in a 9 or 10-inch loaf pan. Alternatively, you can divide the dough between two standard 8-inch loaf pans to make smaller loaves. Just keep in mind that smaller loaves will bake faster, so be sure to adjust the baking time accordingly.
- Alternate Pan – If you’re someone who loves for all of the rolls to have that crispy golden top, I highly recommend making the pull apart rolls in 9-inch round spring form or 10-inch pie pan, 8-inch tart pan or a 10-inch cast iron skillet.
- Additional Baking Options – Bake this bread in a bundt pan like monkey bread, individual size in a standard size muffin pan (4 pieces in each well) or a square 8×8-inch baking dish.
- Serving Suggestions – Serve these rolls as a savory side dish, especially alongside classics like soup, pasta, stew, baked ziti, lasagna or spaghetti.
- Serve as an Appetizer – They also make a fantastic appetizer or snack, perfect for dipping into warm marinara or pizza sauce or a light drizzle of honey for a sweet and savory twist.
- Use with Dips – Fresh from the oven, this warm bread is irresistibly delicious with any meal, but it really shines at parties when paired with dips like creamy spinach artichoke dip or marry me chicken dip. Don’t be surprised if it starts disappearing the moment you set it out!
I can’t wait to make these on Friday. I am going to pair them with a White bean Chicken chili. I think my family is in for a nice treat. Thanks for recipe!
Tammy
I’ve never used refrigerator rolls for these, but, it would probably work in a pinch. There wouldn’t be any need for them to rise, of course. If you try it, come back and let me know how it worked.
Can this be made using a tube of refrigerator rolls. I would still cut them.
How do you pin this to Pinterest. There is no button for it.
The top two pictures have “pin-it” buttons. I’m not sure why you can’t see it, sorry. Otherwise, you can find it on my board Sweet & Savory Breads.
Meridan, thank you I just lol! ☺ Enjoy!
My diet. You killed it. And I’m sooo glad!
Sure do. If you click on the green print button and look at the very top. You can print with or without the pictures or save to a pdf it ‘s your choice.
Do you have a print option without all the pictures or have I just missed it? Pictures take too much ink.
Hi Kara! Welcome, feel free to browse, visit and chat anytime you like. ~ Melissa
I am always looking for good recipes and came across your blog via facebook and so glad I did! I’ve been looking through your recipes and can’t wait to start trying them! Thanks so much for all your time posting them! 🙂
Hello, as you can probably see from the pictures, the yeast rolls are small rounds of prepared dough. You can still make this bread, using your favorite homemade sourdough or yeast bread recipe. Divide into equal portions and follow the recipe above for the remaining ingredients. It should work great! Thanks for stopping by ~ Melissa
Hi, what if i want to knead the dough myself? How should I do? My country don’t sell Rhodes dinner rolls 🙁
thanks.
Hi Gaye! Great question, I do still cut the rolls, because the concept of this is a pull apart bread. However, if you prefer to leave them whole, it will still work and they’ll be sinfully delicious. 🙂 Enjoy, Melissa
Melissa, if using the spring form pan do you still cut the rolls? My family loves bread and I know this will be a big hit. Thanks
Thanks for stopping by, so happy you enjoyed these rolls! For the loaf pan, you’re right, there are several layers of dough pieces and they sort of “stack” in the pan. I love the look and make this bread in a loaf pan at times, but, personally prefer the second method I demonstrate in the springform pan at the bottom of the recipe. In the springform pan, each roll bakes forming the fabulous golden crust. I don’t usually need extra pans, and yes, the loaf pan does puff up and hang beautifully over the sides. So, I would recommend, if you enjoy “crusty” rolls a single layer 8 or 9 inch springform pan will give the very best results. Thanks again for stopping by to let me know! Blessings ~ Melissa
Yummy, indeed. I think it might be easier to manage the quantity of roils in the butter solution by sprinkling the parmesan on after each layer put into whatever pan you are using. Also, I was making so many, I ran out of grated parmesan and used shaved instead on the top of each layer, as well as the top overall. Nice look.
Also, I would appreciate more details on how many 1/4 sections you think fit into each size pan. Your photos seem to indicate you used only one layer, but I had many more left over and so made multiple layers.
Besides the baking rolls literally spilling over the sides of both pans I used (a spring form and an 8″ square), they were fine and a pleasure to look at. I had misplaced my original Rhodes pull-apart recipe, so I was glad to find yours. Thanks. They’ll be gone in no time once the family arrives!
Hi Jane, thank you so much for letting me know. I’m delighted you’re enjoying these rolls, they remain a favorite at my house, too. Thanks for stopping by, Blessings ~ Melissa
Just made a double batch and arranged it it a single layer on a sheet pan (13′ x 18″). This is so good! I’ve taken it to the last few get-togethers and always need to provide Melissa’s link to someone who wants the recipe. Thank you for a great twist on pull apart bread and using Rhodes dough makes it so easy.
Sounds like you’ve been enjoying Rhodes products for a long time. I wonder if you’re referring to a different version of cheese rolls. Anyway, great to hear from another baker 🙂 Take care, Melissa